HDR Photography Tutorial
his is a detailed tutorial on HDR Photography for beginners and how you can create HDR images from single or multiple photographs using different exposures.
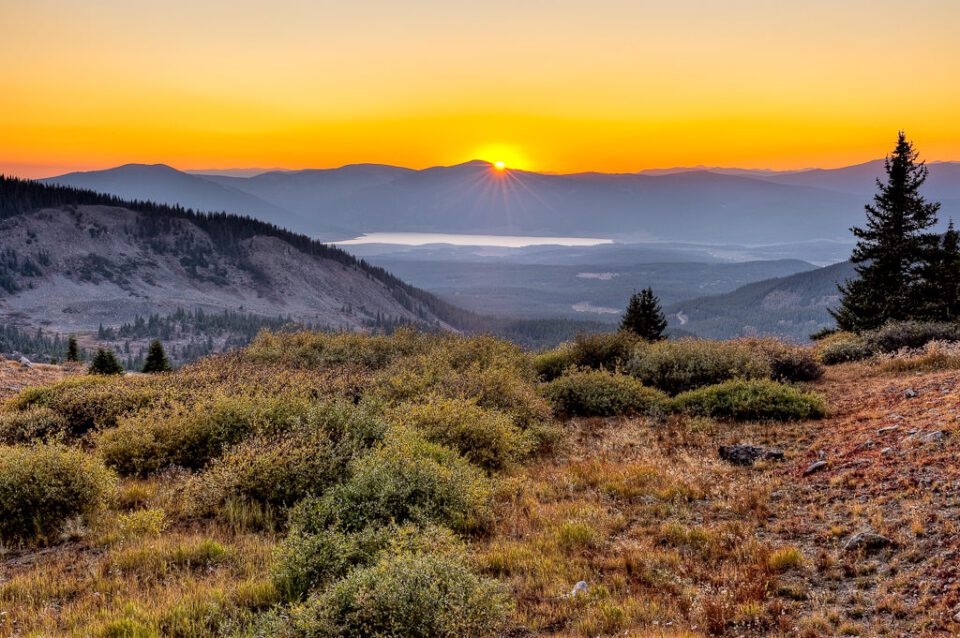
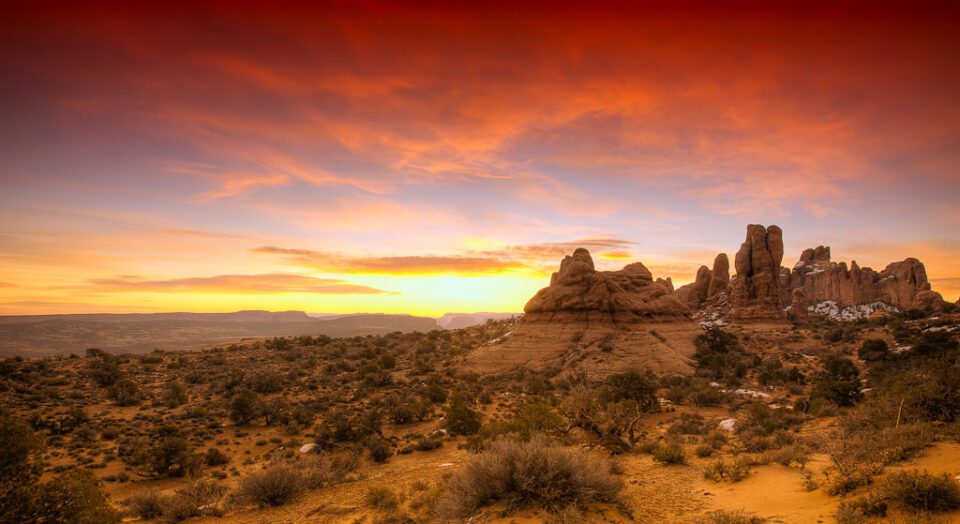
While I was driving through Rocky Mountains last year, I saw a beautiful sunset. It was so beautiful, that I stood there in awe for a moment, before taking out my camera and attempting to take a picture. I took one quick shot of the sunset and quickly realized that there was too much contrast between the sky and the mountains for my camera. The image came out horrible – the sky looked somewhat fine, but the mountains were pitch black. I only had my camera and my trusty tripod with me, so I knew that I did not have many options. I decided to try out a photography technique known as “HDR” or “High Dynamic Range” and I ended up with the following image:
While some people really like the above image, others just hate it. That’s how it goes with HDR in general – the surreal look of HDR photographs is not for everyone to love and enjoy, although, there are cases when it is done extremely well. But let’s save this discussion for later and first try to understand what HDR photography is all about.
One thing that you should always keep in mind while taking pictures, is that your camera does not have the same capabilities as your eyes when it comes to seeing both bright and dark tones in a scene. Our eyes are equipped with the most advanced technology, allowing us to see and perceive colors and tones no human-made electronic device can even come close to. This range of tones and colors is known as “dynamic range” in photography, which has become a key performance metric on modern digital camera sensors – the more dynamic range, the better the sensor.
If you have been using a digital camera for a while, you most likely ran into a similar situation as the one I described above, where you would take a picture and parts of it would either be too bright or too dark. No matter what settings you tweaked on your camera, nothing would seem to help, despite the fact that your eyes were seeing everything just right. If you switched your camera to manual control, you could brighten up one area, which would darken another and vice-versa, but no settings would correctly expose both, all due to the large dynamic range of the scene.
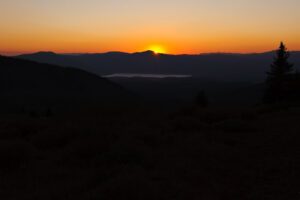
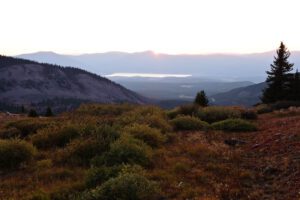
I tried to do the same with the above image and ended up with the following two photographs:
The left image shows that while I was able to correctly expose the sky, the ground turned out too dark for me to be able to recover any details from it. In the second image, I tried to correctly expose the ground, but ended up completely blowing out the sky. It was clear that my camera, despite having an advanced full-frame sensor, was unable to capture such a large dynamic range.
But what if I captured an underexposed, normal and over-exposed images of the same exact spot and then combined them together into one image, where everything is properly exposed? That’s exactly how HDR works.
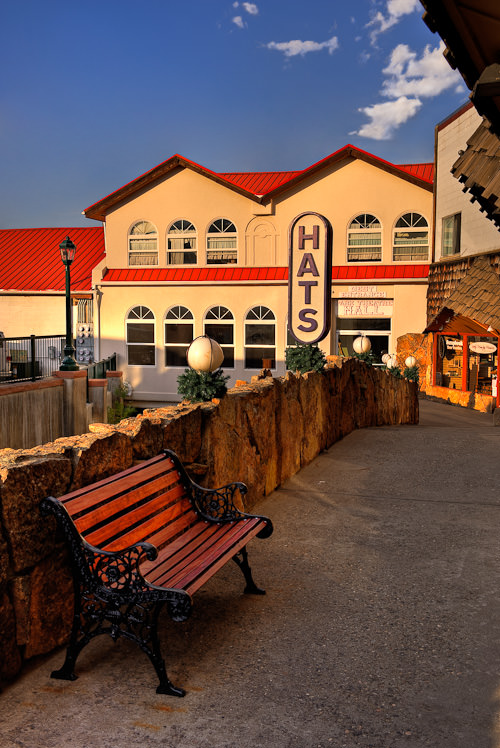
1) What is HDR?
HDR or High Dynamic Range Photography is a post-processing technique that uses multiple images of the same scene shot at different shutter speeds to combine them all into a single photograph. The result is an image with the most amount of detail in both shadow and bright areas of the image, close to what the human eye would see. Although it is ideal to use multiple images of the same scene, you could also create an HDR image from a single image, as long as it is shot in RAW format. Hence, there are two methods of creating an HDR image: a) from a single image and b) from multiple images. In this article, I will show you how to do both.
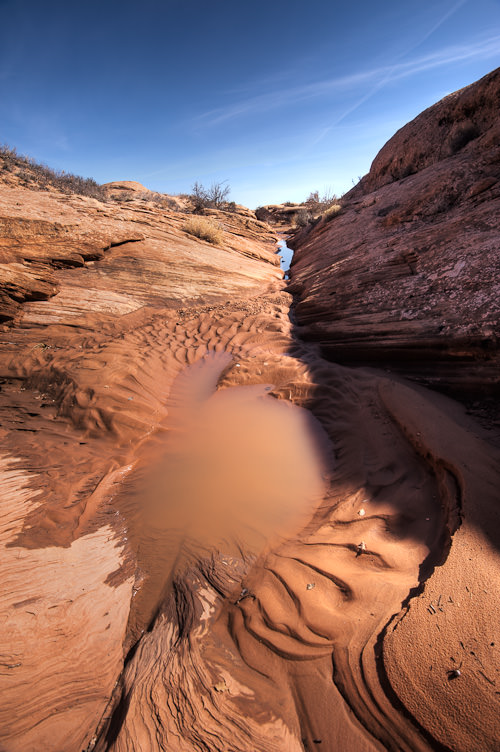
Nikon D700 @ 16mm, ISO 200, 1/125, f/10.0
2) HDR Requirements
In order to generate an HDR image, you need to have the following tools:
- Digital camera (preferably a DSLR)
- Tripod (for multiple exposures)
- Adobe Photoshop or some other image-editing tool
- Photomatix Pro or other HDR software (optional)
- Noise Reduction software like Nik’s Dfine or Noise Ninja (optional)
Although you could get away without a tripod by shooting hand-held in brackets and let HDR software automatically align the images, I still recommend shooting with a tripod to get the best results. Aligning images works most of the time, but you would lose a portion of the image.
In terms of HDR software, you can use Photoshop’s built-in HDR functionality or third party applications like Photomatix Pro. I personally prefer to work with Photomatix Pro, because it offers much more functionality than Photoshop and is very easy to use, once you understand how to work with it. There are some other tools out there (including free & open source), but they are nowhere close to what Photomatix Pro can offer.
3) Camera Settings
For best results, I highly recommend to do the following:
- Shoot in RAW. See my RAW vs JPEG article to see why you should be shooting in RAW.
- Always keep the aperture the same between the shots, so I recommend shooting in Aperture Priority mode. You do not want to have images with different depths of field.
- Set your camera metering to Matrix (Nikon) or Evaluative (Canon) to let the camera pick the best exposure for the whole scene. This will be your middle exposure.
- Use the bracketing function of your camera and shoot in 2 EV steps if you are doing three brackets or 1 EV step if you are doing five brackets. For example: -2, -1, 0, +1, +2 works great for most situations.
- Watch out for wind – too much of it will move bushes/grass/trees, which will screw up your final image.
- Shoot frames quickly in bursts, especially if you have clouds in the frame.
- Watch out for other moving objects. Although Photomatix Pro has a built-in function to reduce ghosting artifacts, it is still best if movements are minimal – motion is difficult to fix in software.
4.1) HDR Photography Using a Single Image
You can create HDR images from a single image, as long as both the brightest and the darkest parts of the image are somewhat recoverable. What this means, is that your brightest part of the image should not be completely blown out, while the darkest part of the image should not be pitch black. Therefore, you can only use images that are properly exposed with as many details preserved as possible. Keep in mind that RAW images (especially 14-bit+ RAW images) contain lots of data that you are not going to see when the image is viewed from Photoshop or Lightroom. In order to see this data, you would need to increase and decrease the exposure within Photoshop/Lightroom.
Take a look at the following image that I took at the Sand Dunes National Park:
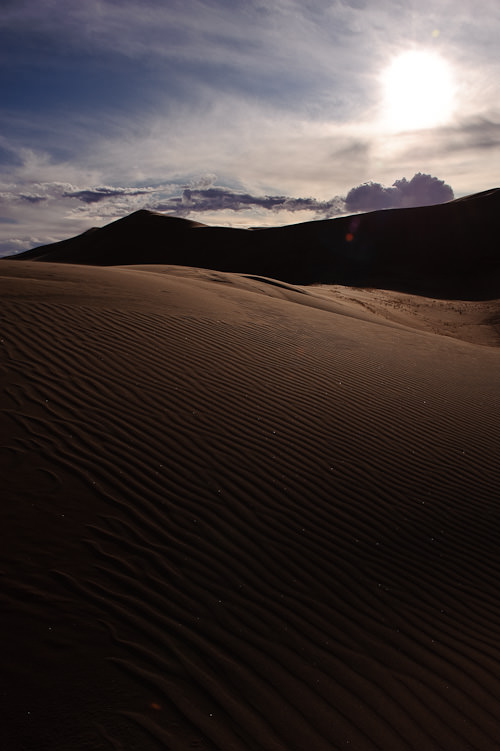
NIKON D700 @ 24mm, ISO 200, 1/800, f/14.0
While the exposure seems to be way off, the RAW image actually contains plenty of data of the sky and the dunes. I can get more details out of the sky by decreasing the exposure to -1 and at the same time I can get plenty of details from the sand by increasing the exposure by +3:
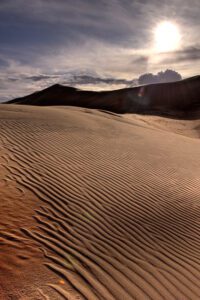
By decreasing and increasing exposure, I can extract a total of 5 images from the above RAW file: -1, 0, +1, +2 and +3. I can then use all five images to create a single HDR image in Photoshop or other third party HDR tools. Here is what I got after running the 5 images in Photomatix Pro:
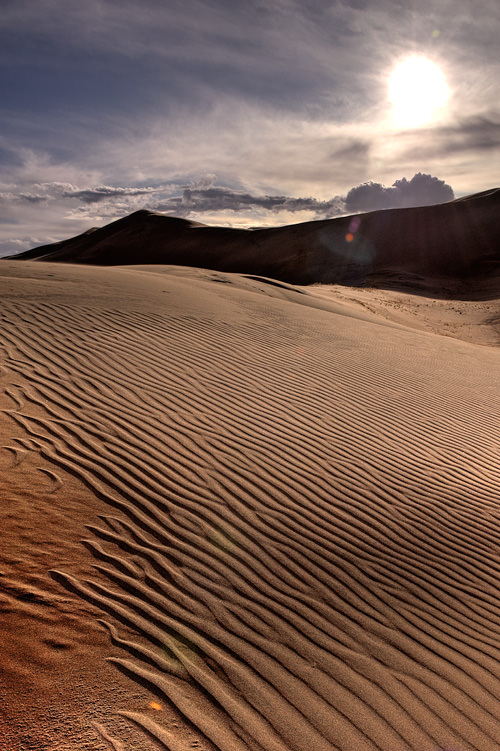
The process is simple – decrease and increase exposure by one full stop (-1 or +1) and extract each as a separate 16-bit TIFF file. Next, open Photomatix Pro and do the following:
- Click “Generate HDR image”
- Click “Browse…” and select the extracted TIFF files. Click OK.
- Since the exposure data within the files is identical (shutter speed, aperture, ISO), Photomatix does not know which exposures you chose in your files. Therefore, you will be presented with a separate screen that will ask what exposure steps there are between the files. Look at the files and make sure that your normally exposed shot stays at 0, while the other files have the exposure values properly defined as seen below:
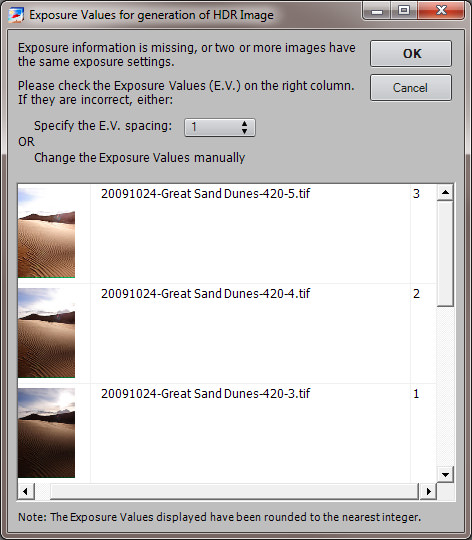 If any of the numbers are wrong, change them manually for each file.
 - Click OK
- Now you will be presented with a new window. Set the settings as show below:
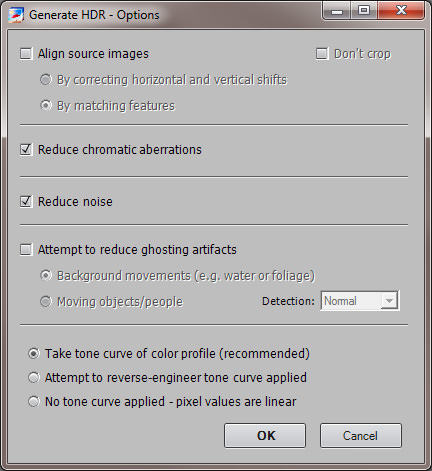 Since we are merging different exposures from the same image, there is no need to check “Align source images” and “Attempt to reduce ghosting artifacts”.
 - Click OK
- Once all images are analyzed, an HDR image will be generated with the default settings. The first image will look very crappy, but it is OK, because you have not done any tone mapping on it yet. Click the “Tone Mapping” button on the left side of the image to open a new window.
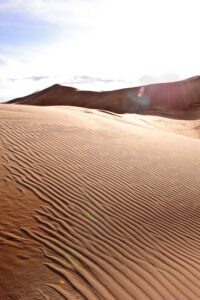
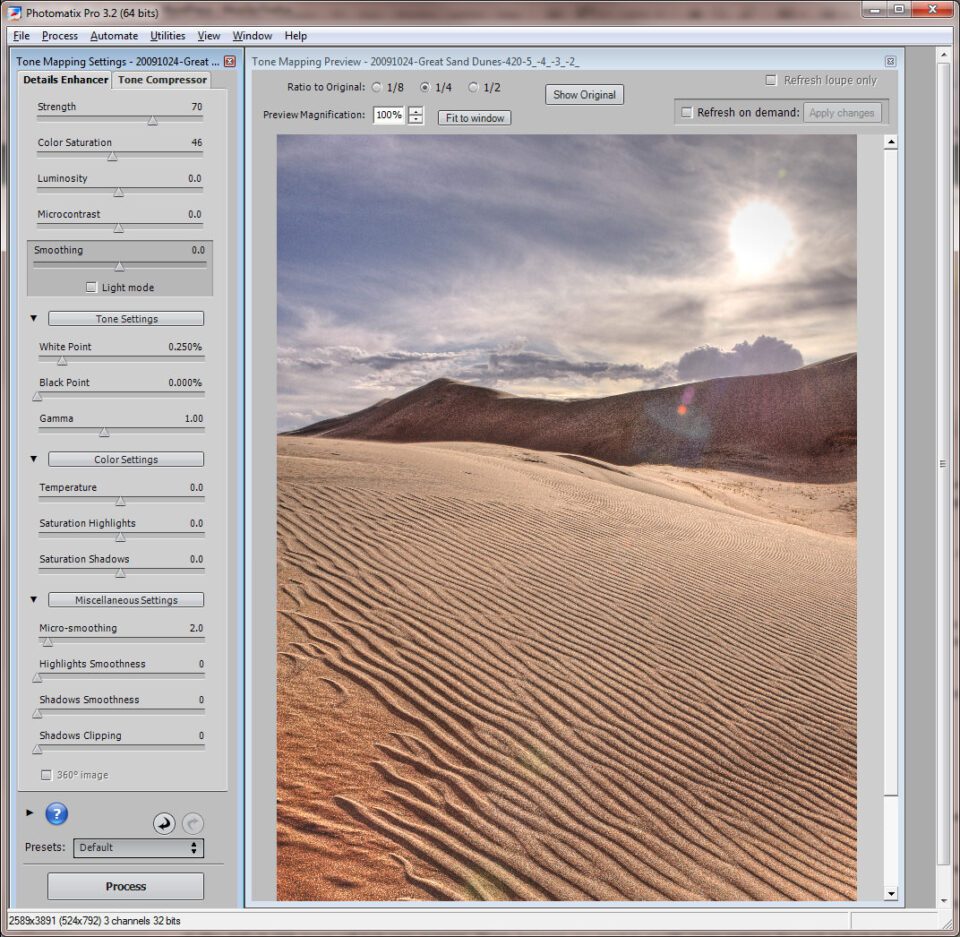
- The default HDR image will look very average. That’s because you need to modify some settings for each individual HDR image. Here is how my Sand Dunes shot came out with default settings:
Looks OK, but not the result I want yet. Let’s modify the settings a little bit.
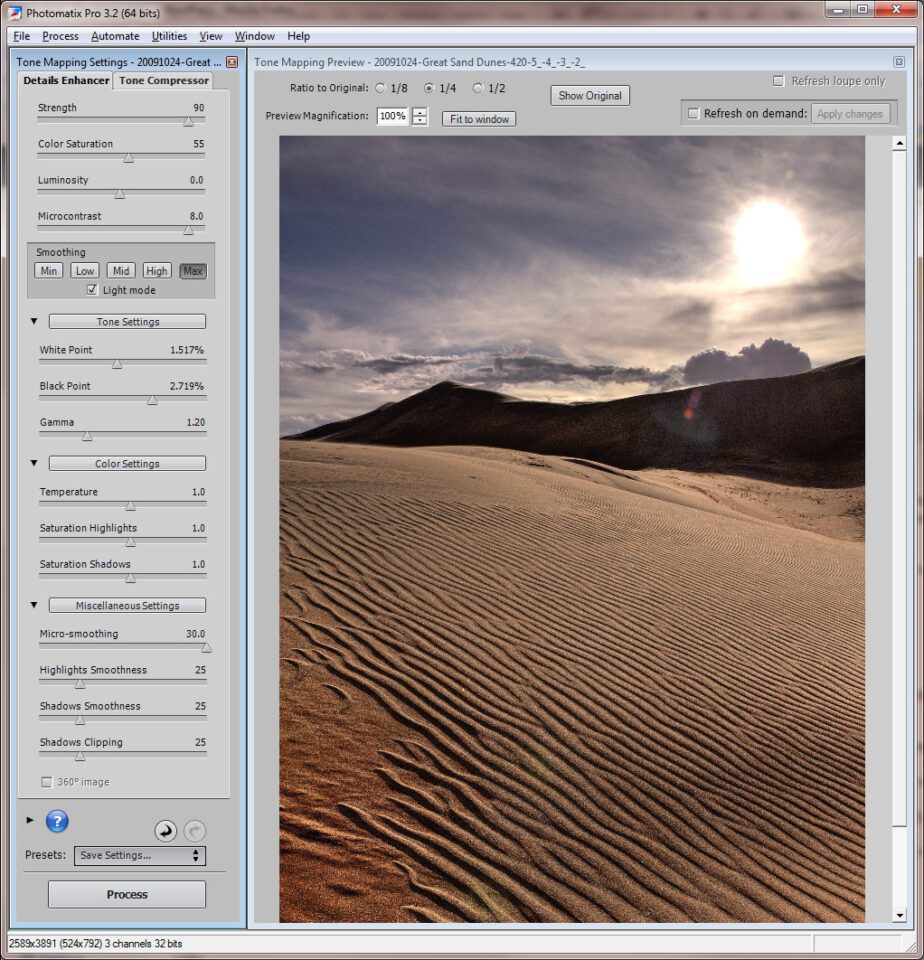
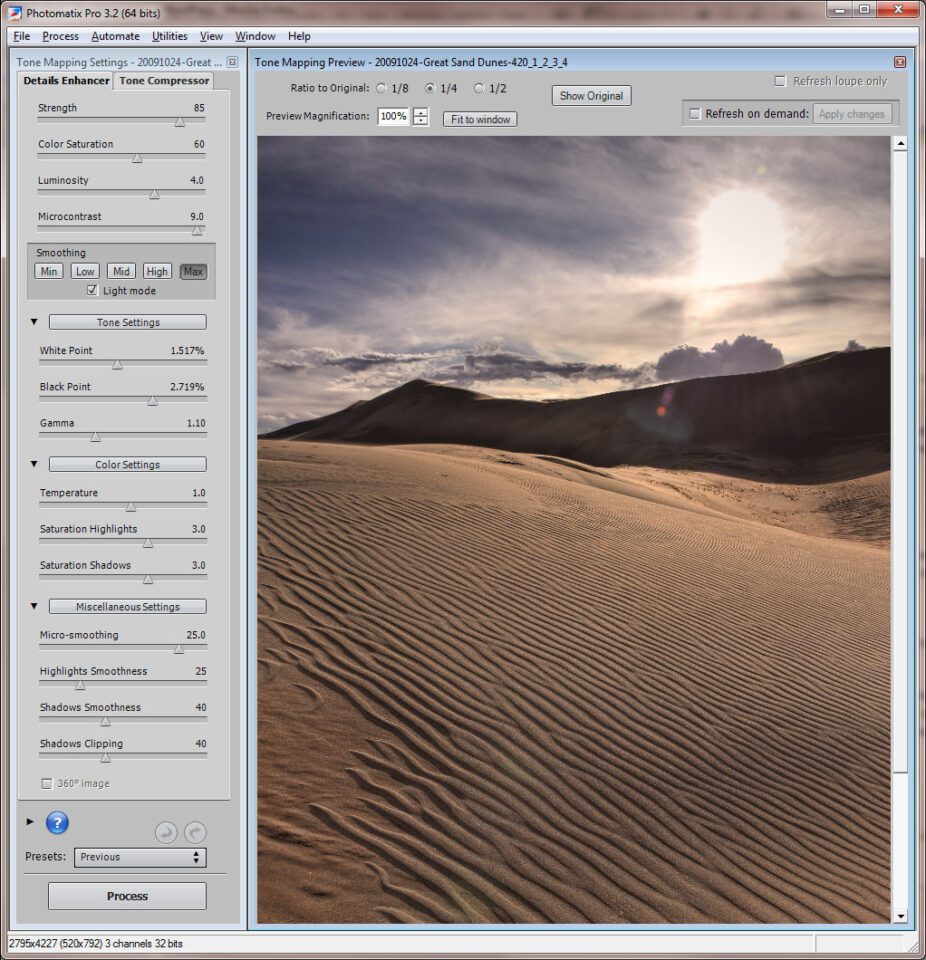
- Here is what I used for the HDR version of Sand Dunes:
Aha! Looks much better. Obviously, each image is different and you might need to change the settings to suit your taste.
- Click the “Process” button for Photomatix to generate the HDR image.
- Now let’s save the HDR file. Go to “File->Save As” or press CTRL+S to save the file.
- Open the image in Photoshop, remove the extra noise via noise reduction software, sharpen it up a little and you are good to go! You can also play with colors and curves, if needed.
Done!
Some people might argue that doing the above is silly, because we can recover a similar amount of data from a single RAW within Lightroom. While I certainly prefer to do the latter, HDR gives a totally different look and feel to a picture. Take a look at the below two images and compare:
The image on the left is an HDR image, while the image on the right is fixed in Lightroom with a Graduated Filter (-1 on the sky and +2 on the sand, +10 fill light). As you can see, the HDR version has a different feel to it when compared to a regular image. Let’s move on to HDR with multiple images – the way HDR images should be created.
4.2) HDR Photography Using Multiple Images
I personally create HDR from a single image just for fun – I almost never use the above technique for my work that I publish on our website. The reason is simple – I do not like HDR that much. Read why I say that below.
Let’s now talk about using multiple images to generate an HDR – the right way to do HDR. If we were able to get so much detail from a single image, think of how much detail we could recover from multiple images! Just three images shot at 2 EV (-2, 0 and +2) will work great for most cases, so if your camera can only support three brackets, set the exposure difference to two full stops. If your camera supports 5 brackets, set EV to a single stop, which will let you shoot -2, -1, 0, +1 and +2.
Let’s now generate an HDR image from these files.
- Once you have your images ready, load them into Photomatix Pro by clicking the “Generate HDR Image”. It is best to use the original RAW files, so either use those (CR2 for Canon and NEF for Nikon) or extract the DNG/TIFF files out of Lightroom in 16-bit mode. Photomatix can work with pretty much any image format, so you can feed those images directly into the application without the need to convert them.
- Loading RAW files brings up some more options – white balance and color profiles:
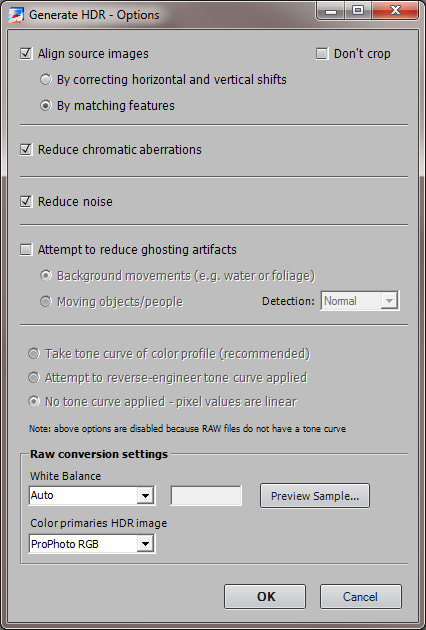 Choose the right WB and use ProPhoto RGB to preserve the most amount of colors. I recommend putting a check-mark in front of “Align source images” this time, because you are using multiple images and some of the images might not be perfectly aligned. If you have anything that is moving between your shots, also put a check-mark in front of “Attempt to reduce ghosting artifacts”.
 - Click OK once done to start the process. Performance-wise, using multiple RAW images will take more resources and the process will be significantly longer, so be patient.
- When the first image comes up, click the “Tone Mapping” button to start working on the HDR image.
- Play with the settings and see what looks best to your taste. Here are my settings for the Sand Dunes shot:
While the above settings are fine for this particular shot, they might not work for your image, so experiment a little.
- Once done, click the “Process” button to let Photomatix Pro generate the HDR image.
- Now let’s save the HDR file. Go to “File->Save As” or press CTRL+S to save the file.
- Although the amount of noise on the HDR image should be much less than what you would get from a single image, there still might be some noise present in the image. Open the image in Photoshop, remove the extra noise via noise reduction software, sharpen it up a little and you are good to go! You can also play with colors and curves, if needed.
- Here is how the final image came out:
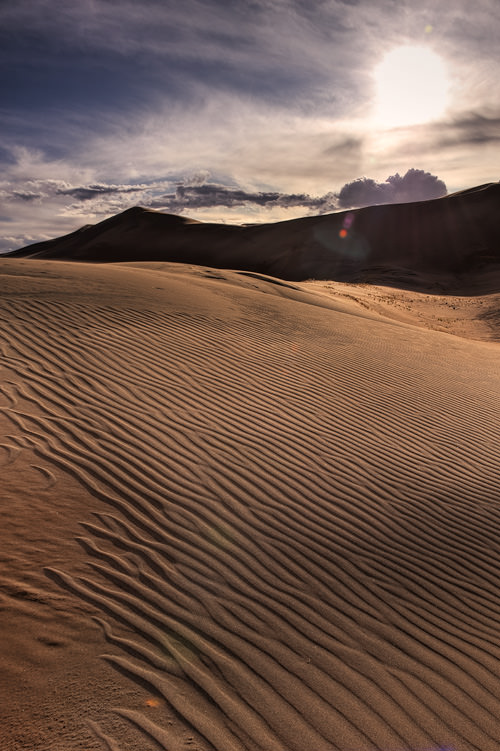 Note that the shadows look a lot more natural now and there is no noise visible in the image. This is all due to the fact that we pulled plenty of detail from all images and we did not have to increase or decrease exposure, which is essentially what causes noise.
Done! Now you have a full HDR image with plenty of details throughout the frame.
5) HDR Use and Abuse
Thanks to photographers like Trey Ratcliff and various Flickr HDR groups, HDR Photography has been gaining more and more popularity on the Internet. While the majority of the people that use HDR are beginners and amateurs, there is an impressive number of pros out there that are now using HDR for their commercial landscape and architectural photography work. Using a DSLR is cheaper and more convenient than using a medium/large format system and when used properly, HDR can deliver outstanding results that rival the quality and dynamic range of expensive camera systems.
At the same time, HDR opened up new avenues for “HDR Surrealism”, where so many pictures are converted to ugly, cartoon-like images. At times, it almost feels like the Internet is being taken over by ugly HDR photographs. So, is HDR evil? Where is the fine line?
I personally stay in the middle – I think that HDR is a good technology, as long as it is used moderately and properly. HDR opens up new opportunities for photographers and lets us capture and see things differently. I really like HDR photographs that are done so well, that you would not be able to tell if it is an HDR image or not. I call it “realistic HDR” (which is a separate subject to discuss on its own) and I believe that every photographer should learn how to create realistic HDR images.
As for myself, I only use HDR when it is impossible to capture a scene otherwise – for sunrise and sunset shots and other difficult lighting conditions.
Please let me know if you have any questions in the comments section below.



0 comments: