Nikon D7200 Review

Nikon D7200 Review

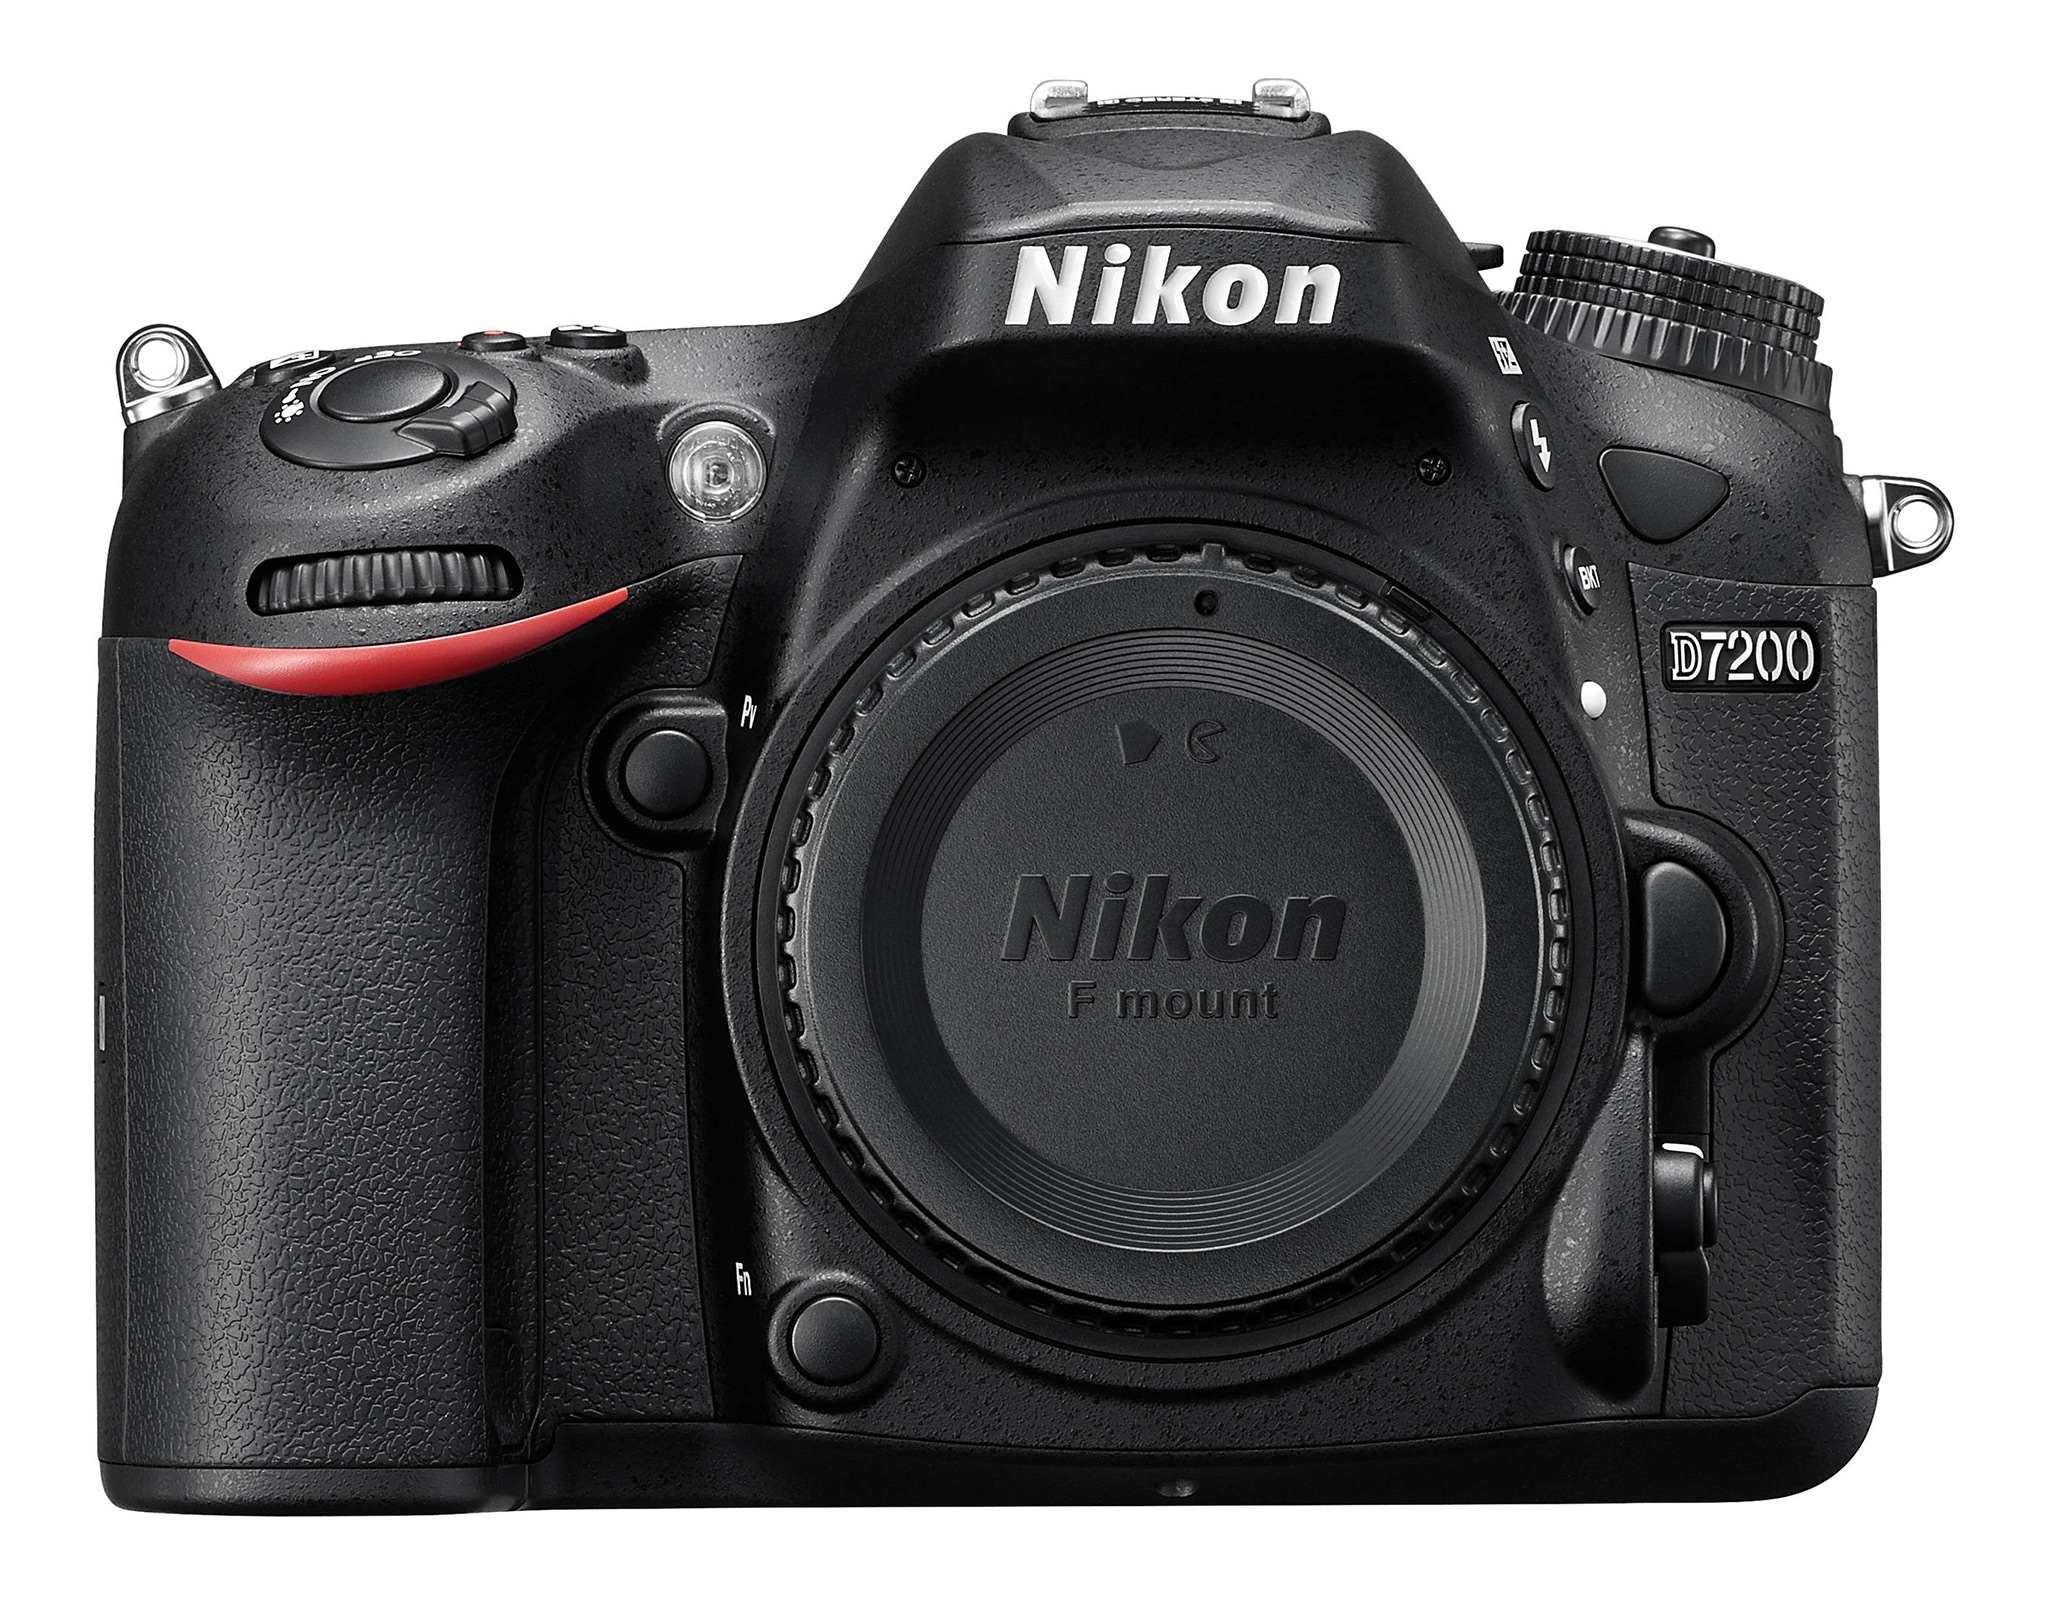
The Nikon D7200 is Nikon’s newly released top-of-the-DX-line DSLR. With the D7200, Nikon is holding firm in their conviction that their flagship DX model should cost $1200, the same price as the D7100 at its introduction. Compared to the D7100, the D7200 has nearly three times the buffer, an improved AF-system, the latest EXPEED 4 processor and a bunch of other nice features, especially for video shooters. Let’s check some specs, but first a warning – Nikon released the D7200 right at prime mating season in Arizona. Birds and bees were being birds and bees.  This could be our sexiest review yet.
Nikon D7200

1) Key Features and Specifications

  • DX-format DSLR – 1.5x crop factor
  • 24 MP CMOS sensor without an optical low pass filter
  • Up to 5 fps continuous shooting in 14-bit RAW
  • Up to 6 fps continuous shooting in 12-bit RAW or JPEG
  • 1.3x crop mode gives 13.5 MP images and up to 6 fps in 14-bit RAW or 7 fps in 12-bit RAW
  • Buffer: 13-22 shots in 14-bit lossless (as tested – Nikon advertises 18 shot 14-bit lossless buffer), 97 shot large fine JPEG (as tested)
  • New Multi-CAM 3500 DX II AF system with TTL phase detection, 51 points with 15 cross-type sensors. Center sensor is capable of focusing f/8 lenses
  • ISO Range: 100 – 25,600 (full color), boost to 51,200-102,400 (black and white only)
  • Metering Sensor: 2,016-pixel RGB (3D Color Matrix) sensor
  • EXPEED 4 processor and 14-bit A/D Conversion
  • Twin SD Card Slots with SD, SDHC, and SDXC memory card compatibility
  • Eye-level Pentaprism Single-Lens Reflex Viewfinder with 100% frame coverage
  • Full 1080p HD video recording at up to 30p (1x mode) and 60fps (1.3x mode)
  • Up to 9999 shot in-camera time lapse with exposure smoothing
  • Detection Range: -3 – +19 EV (ISO 100, 20°C/68°F)
  • Body Type and Shutter: Magnesium-alloy body, superior weather/moisture and dust seals and a 150,000 cycle-rated shutter system
  • LCD: 3.2 Inch, 1,229K-dot LCD Monitor
  • Built-in Wi-Fi with NFC
  • US Price: $1,199 – body only

2) Build and Handling

If you shoot with a D7100, D810 or D750, the D7200 will feel familiar. I like how it fits my hands and I always feel like I have a secure grip on it. Most of the key buttons are in the same location and I found I could go back and forth between my D810 and the D7200 almost seamlessly. The biggest difference would be the rear-AF button placement on the D810 that has always driven me nuts. I much prefer having just one button there like on the D7200. I shoot in manual a lot and by assigning the video record button to adjust ISO in still mode, I have shutter speed, aperture and ISO controls all quickly adjustable with my right fingers. In comparison, my D7000 is much slower and clumsier to set the ISO on, requiring that I take the camera away from my face. A check of the D7100 owner’s manual and firmware updates indicates that the D7100 doesn’t allow this either.
Verm-Vermillion-Flycatcher-female-BANWR-4173
Nikon D7200 + 800mm f/5.6 @ 1000mm, ISO 800, 1/2000, f/8.0
The D7200 is better weather-sealed than the D7000, but seeing as my D7000 has lasted 200K+ shots and I usually shoot in very dusty outdoor locales, build quality wasn’t an issue there. At 674 grams (23.9 ounces) the D7200 is reasonably light and balances well with lighter lenses, but not as well with heavier lenses like a 24-120mm, 18-300mm or 150-600mm. The D7200 lacks the crappy low-res plastic LCD cover found on the D7000. It does however have the same eyepiece cover that snaps off way too easily and wants to get lost, just like on the D7000, D7100, D600 and D750. Lastly, my pet peeve about all Nikon DSLRs; the D7200 comes with the painful D-Kapitator neck strap, except this time it doesn’t even have “D7200” embroidered on it. WTF? How will I know how many Nikon’s I’ve owned if I can’t look in my box full of discarded straps and read off all the model numbers?
Nikon’s D7200 is a dynamite machine and a pleasure to shoot. It’s nimble, responsive and has good ergonomics.
The D7200 sensor is a terrific performer. If DX sensors get much better could FX and those heavy FX lenses be in danger? If a camera manufacturer decided to produce a full line of DX primes, which would be much lighter than their FX counterparts, it could really shake things up. DX is starting to stand for Darned Exceptional.
The D7200 has the most capable AF system I’ve used with any Nikon DSLR. My D4s is jealous.
For all-around photography it’s a winner. The major changes from the D7100 to the D7200 mainly benefit video and timelapse shooters, with a slight nod to the action shooters with a bigger buffer. It’s the first Nikon DSLR with built-in wi-fi and NFC for those who want to share images on the go. For wildlife and other action photography it’s compromised by a low frame rate and skimpy buffer, making it no match for Canon’s 7DMkii.
Verm-Andrew-D7200-0643
Nikon D7200 + 50mm f/1.8 @ 50mm, ISO 250, 1/400, f/4.0
Would I buy the D7200? I guess I’ll find out if I yearn for it after returning the review copy. I feel it would be a worthy upgrade to my trusty, but aging D7000. I dig the reach, the detail and the AF performance, but I still foolishly hold out hope for Nikon to answer Canon’s 7DMKii challenge with a pro-DX body of their own.

Buy Nikon D7200


The Ultimate PC Build for Photography Needs

hanks to the super high-resolution sensors we see today in digital cameras, a fast computer is absolutely essential for an efficient post-processing workflow when working with RAW images. If a few years back a standard PC or a mid-range laptop were good enough for post-processing images, 30+ MP RAW files can put a huge burden on processing power and make a high-end machine seem obsolete. In addition, most commercial software targeted at professionals has also gotten pretty heavy, requiring more memory, faster storage and high-end CPUs and GPUs for a smooth, delay-free experience. Having spent most of my adult life in information technology, I have always been building my own PCs. In my recent articles and reviews of storage equipment, a number of our readers asked me to share my preferences for a solid, future-proof PC build that could take pretty much anything you throw at it for post-processing large numbers of RAW images and video. In this article, I want to talk about my ultimate PC build for photography and other needs, and discuss my personal preferences for working with Lightroom catalogs and RAW files in terms of file management and performance optimization.
I will be presenting two different builds – one based on a full tower case, which gives a lot of flexibility in terms of space, storage and future expansion options, and one based on a very compact build for a lightweight setup that occupies minimum space. Although I have always been using large cases, I have been leaning towards more compact options lately – primarily because it is now possible to build small, but powerful machines.
Let’s start with the architecture – which way is to go, Intel or AMD?

1) Architecture

Bringing up Intel vs AMD can sometimes spark up debates among PC enthusiasts, similar to what we see when one brings up Nikon vs Canon. Ever since seeing AMD CPUs melt and explode when a fan quit working (yes, that was a while ago) I have always chosen Intel as my architecture. And I have never looked back or regretted this choice, since Intel has been rock-solid in every build I have had. Taking a quick look at this chart from CPU Benchmark reveals why millions choose Intel over AMD – the top of the chart is dominated by Intel and has been like that for a while. Intel rules both the PC and the Apple world for a reason and you can find similar benchmarks in many other sites. If I offended AMD fans with this, I apologize ahead of time!

2) Chipset and CPU

With Intel being the top choice for architecture, the next step is determining the chipset and the CPU. And although Intel’s latest architecture is X99 and Skylake has not been announced yet, I normally don’t go with the latest chipset (as it can get unnecessarily costly), and rather concentrate on the fastest and most value-driven processor on the market. And without a doubt, “Devil’s Canyon” intel Core i7-4790K  proved to be the top choice for a while now, with its insane single and multi-core performance that seriously challenges the latest Intel CPUs. Since the Intel i7-4790K has the LGA1150 socket, it means that our default choice is Intel’s Z97 chipset. Although Z97 is pretty aged by now, it is a very solid chipset, with plenty of great motherboard choices on the market. Now that we know what we want in terms of both CPU and chipset, let’s move on to selecting the right motherboard.
Intel i7 CPU

3) Motherboard

The choice of a motherboard is tough, because there are so many choices available out there. There are brands, then there are models, ranging from affordable to not so affordable. When building PCs, I don’t bother with picking either a low or a high-end motherbooard, since the best value is in the mid-range. However, I do have selection criteria – I want a motherboard that comes with an M.2 slot, which is critical, as you will see below. As for a choice of brand, I have tried many brands including Tyan (anyone remember Tyan Trinity with dual CPU support?), ASUS, MSI, Gigabyte, ASRock, Intel and SuperMicro, and I always keep coming back to ASUS. While I am not a big fan of ASUS software (particularly their AI Suite software), I have not been disappointed with the hardware, which has been rock-solid, running for many years. That’s not to say that other motherboards are bad – ASUS has just been my personal preference all along. But ASUS does come with a relatively high price tag, so if you find that the motherboards I picked below are too expensive for your budget, feel free to pick any other motherboard with WiFi + M.2 support.
Another brand that I have recently started to favor is ASRock, which is basically a daughter company of ASUStek, the same company that makes ASUS hardware. As you will see below, my top contender for the Z97 chipset for desktops is an ASRock motherboard.
So based on the above, the below two motherboards are my top contenders for the builds:
  • Full Tower Build: ASRock Z97 Extreme 9  – my primary reason for picking this ASRock motherboard is M.2 support – this motherboard has two slots, one of which is PCIe Gen3 x4 based. If you want to make a nice Hacintosh, the motherboard also comes with a Thunderbolt AIC Connector. My only gripe with this is lack of built-in WiFi, but there is a mini-PCIe slot that you can use to add WiFi, if you need it. For a full tower build, WiFi might not be as critical.
  • Compact Build: ASUS Maximus VII Impact  – while this is probably the priciest mini-ITX motherboard on the market, it is for a reason – it is the only ITX motherboard with Z97 chipset that comes with a super-fast M.2 x4 slot. Add on all the goodies like WiFi, Bluetooth, 4 USB 2.0 and 4 USB 3.0 slots on the back and you will see why I picked this motherboard as the top choice for a compact build.
ASUS Maximus VII Impact

4) M.2 Slot – Faster than SSD

If you have been using an SSD drive and have been impressed with its performance, you have only touched the surface when it comes to extreme storage performance. The new generation M.2 SSD drives deliver up to 32 Gb/s speeds, which is a boatload faster than 6 Gb/s limit of the SATA interface to which traditional SSD drives attach. So there is simply no comparison between SSD and M.2 SSD – some of the best M.2 SSD drives today can deliver up to 1,600 MB/s read speed, while the best SSD drives will cap at 500 MB/s, if that. That’s over 3x performance you would be getting with M.2! So imagine booting up your operating system in a matter of seconds and using that extreme performance for cashing and other read/write-intensive operations. You know where your Lightroom catalog would live…
As for the choice of an M.2 SSD unit, I would not get anything less than the Samsung SM951. This is the puppy that will give you 1,600 MB/s read and 1,350 MB/s write speeds. Nothing beats that at the moment. When XP951 hits the market, it will be my top choice, but for now, the SM951 is simply unrivaled.
Samsung SM951
Size-wise, I would not settle for anything less than 512 GB. Yes, that’s pricey, but 256 GB won’t cut it for large catalogs, especially if you are planning to generate full size JPEG previews . And if you are planning to use the above ASRock motherboard, you should get one Samsung SM951 and one lower-end M.2 unit. The second slot is limited to 10 Gb/s, which is still much faster than SATA. Plus, you save some space and there are less cables to pull and worry about.

5) SSD / HDD Storage

In addition to the M.2 drive(s), which will be hosting your Lightroom catalog, my recommendation is to get fast SSD drives for storing photos. I know many of our readers will disagree with this, because photos can be stored on regular spinning drives as well (which are often fast enough). However, ever since I started using SSDs for storing RAW files, I would have a hard time switching back. Keep in mind that whenever you open and make changes to a RAW file, Lightroom still needs to access it. And if you put those RAW files in faster storage, your access time will decrease and you will see pretty noticeable performance benefits. If you don’t mind the high price tag, my top choice would be the Samsung 850 EVO 1 TB SSD  drives. If you don’t have a lot of photos, go for the Samsung 500GB 850 Evo 2.5" SATA III Solid State Drive  instead, which is much cheaper. Why not go for the 850 Pro series? Because it is overkill for a photo storage in my opinion. However, if budget is not an issue, go for the 850 Pro line instead, as you will get a bit more performance out of those. If you find other brand SSD drives with similar performance, those might be worth looking into as well – sometimes you will find great deals on Crucial, Intel, SanDisk and other brand SSDs. Whatever brand, make and size you choose, make sure to buy two of the same drives. Although SSD is much more reliable than HDD, I would still go for a RAID 1 / mirror setup just in case you forget to frequently back-up your work. Another advantage of SSD is that you won’t have to worry about heat dissipation issues, as they do not get as hot as regular hard drives.
Samsung 850 EVO
For many, going with an all-SSD storage is cost prohibitive. You certainly do not get as much storage as you can with spinning drives either, so that’s another drawback. So if you have a lot of photos that you like keeping on the same volume and you do not want to buy expensive 1-2 TB SSD drives, then go for two 4+ TB hard drives. Just make sure that you don’t buy one of those green drives – go for 7200 RPM drives with a good amount of cache, similar to Western Digital 4 TB Black drives For the full tower build, I would recommend to get four of these drives to use as backup / RAID 1 / RAID 5 storage.
My current workflow is to store current year photos (the ones I actively edit) in SSD storage and move everything else to slower, network-based Synology  (will review it shortly), which is absolutely amazing as a home server. I use Synology  heavily in my environment and Lola and I often access photos from multiple computers, which is very convenient. When she is done editing, we move multiple catalogs to shared storage, merge them there and copy back to our computers, keeping full backups in the common storage.

6) RAM

Choosing RAM can also give you a lot of headache, as there are so many different types of RAM out there. I am typically not as picky when it comes to RAM – I choose a good brand like Corsair, Crucial, G.Skill and Kingston, and pick whichever one is on a good sale. Back in the day I would spend a lot of time looking at RAM timings, overclock-ability and other factors, but nowadays I don’t bother wasting my time – most RAM out there is quite good. I don’t heavily overclock my computers anymore, particularly when going small, so typical timings and speeds are sufficient for my needs. Here are two options I found with a quick search for solid memory:
Crucial Ballistix
Unfortunately, mini-ITX builds are limited to 16 GB of RAM, so that’s the maximum we can use on the compact build. I like low-profile RAM like the above Ballistix series, since they work great with oversized third-party fans / CPU coolers. If you are planning to overclock your rig, I would certainly look into higher-end memory though, potentially with better, taller heat-sinks that dissipate heat better.

7) Video Card

Now that Lightroom and many other applications take advantage of GPU rendering, the speed of your video card certainly does play a role in how fast applications render images / video and respond. If you want to take advantage of this additional benefit, I would get a high-end video card that can easily handle the load. While those with deep pockets and a desire to run a 30-bit workflow should look into NVIDIA’s Quadro-series video cards (which can cost up to $10K alone), I personally went for the NVIDIA GTX 970 video card, which is super fast and easily handles the load I throw at it. At this time, I do not see the benefit of a 30-bit workflow setup for my needs and I cannot justify spending over $1K on a Quadro-series video card, which is why I went this route. So here are my two top recommendations:
I chose a smaller profile video card for the compact build, because it leaves plenty of space for cooling and cables.
EVGA GeForce GTX 970

8) Power Supply

Lots of options for power supplies too and you certainly want to make sure to get a solid power supply that is modular. With a modular power supply, you only add as many cables as you require and you don’t end up with a lot of dangling cords inside the case. My personal favorite has been Corsair CX series PSUs, which are great value. Here are the two I would recommend for the two setups:
Corsair CS850M

9) Case

Now that we have picked a motherboard, CPU, PSU, RAM, storage and a video card, it is time time to pick a case for each setup. Again, the below choices are based on my personal preferences. If you like other brands and models, please feel free to share you opinion in the comments section below.
  • Full Tower Build:. I have been using Cooler Master HAF-series cases for some time now and I love these. Lots of room, plenty of cooling and many options to add lots of storage. If you do not want to go with a tall tower, another recommendation is to go for the HAF 912 mid-tower , which is also a very nice and much more affordable case.
  • Compact Build: Cooler Master Elite 130 mini-ITX case . I have done a lot of research before picking this case. So far I have not found a case that I like better and I have already built 3-4 machines with this case, with impressive results. For the price, it is the best mini-ITX case in my opinion. If you need to build two machines for some reason – a big unit and a compact one, I would seriously consider going for HAF on both cases. Pick the  to be able to stack the smaller unit on top of the large HAF.
Cooler Master Elite 130

10) Monitor

Although a monitor is optional and you can use the current monitor you already have, having a nice 4K monitor with an IPS panel would be sweet for such a high-end setup. I have been personally using Dell’s IPS monitors for the past few years for photo editing and I really like them. Yes, there are great monitors out there that you can buy from HP and Eizo, but that’s only if you are willing to spend over $1K per monitor. My personal choice is to go with a dual-screen setup and my budget is typically limited to $1K max for both. If you want a monitor with better calibration options, the Dell UP2414Q is the way to go (it comes with a built-in LUT, so calibration software does not have to load each time you restart). Otherwise, the Dell P2715Q is a bigger monitor (27″ vs 24″), which is more suitable for 4K content. If you don’t want to go 4K yet and want to stay with a solid 24″ display, my current setup is comprised of two Dell U2413 monitors, both hardware-calibrated.

Polsen ULW-16 Wireless Microphone System Review

If you’re an enthusiastic still photographer who’s started to dabble with video a bit, you’ve likely run into issues with fine visual footage, but substandard audio. Crappy audio can ruin the viewer’s experience every bit as quick as lousy visuals. It soon becomes apparent that your camera’s built-in microphone records not just your subject, but also the camera’s noises (focus motors, VR, heavy-breathing operator) as well as the nearby highway, airport, dragstrip, playground or pig farm. The first step taken usually involves buying a hot shoe-mounted directional mike, AKA shotgun mike. This is great for emphasizing the sound coming from the direction the camera is pointed, but it gets not just the subject speaking or softly purring, but also the jackhammers in the construction site across the street behind your subject. It is a poor choice if you want to record dialogue. For recording talking subjects, the next step is to add a lavalier microphone system. A lavalier microphone, AKA lav, AKA lapel mic, is a tiny microphone that clips to the user’s lapel, collar, or ZZ Top beard. It is very sensitive to sound coming from very close to the microphone and not to sounds further away. Therefore it is ideal for recording the wearer’s words without too much interference from background noise.
1007208
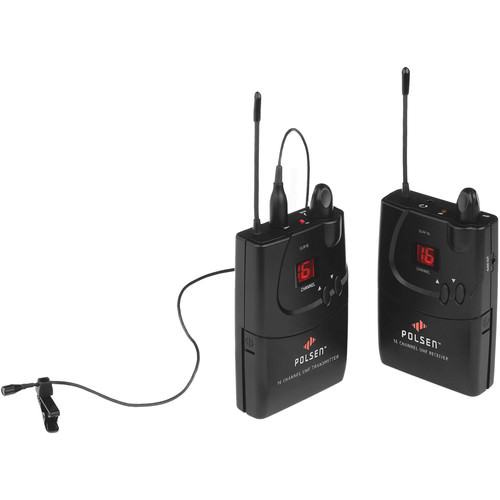
The Polsen ULW-16 is a wireless lav system that comes with the tiny lav mic, one transmitter and one receiver, a storage case and all the various cords you need to connect it to your DSLR, camcorder or other audio recorder. This is a simple system to use if you’re familiar with audio recording.
Lav systems with one microphone/transmitter and one receiver can run you anywhere from just over a hundred bucks all the way to 1500 clams for the sort of rig network weathermen use when giving you blow-by-blow from inside the tornado’s funnel. At $229, the Polsen system tested is one of the more affordable options and not designed for hurricane conditions. Cheaper systems usually only have two channels, thus have trouble avoiding interference. More expensive lav systems have more rugged construction, weathersealing, longer working distances, more channels, and features like auto-scanning for open frequencies, etc.

1) Sound Quality

We gave this system to working pro Dawn Kish to test out and give us her feedback, which I’ve summarized here. This test/review is aimed at how well the ULW-16 works when shooting with a DSLR.
Under favorable conditions, the Polsen ULW-16 system produces good quality sound with little or no hissing or popping. As with any microphone, direct wind wreaks havoc. The lav mic itself needs to be carefully attached to the subject to avoid bad noise from rubbing on the subject’s clothing or beard. The omnidirectional mic allows the speaker to turn his/her head and keep the sound coming in evenly (you can see this in the test video when I turn to shoot and keep talking).
Using the headphones in the receiver gave an airy hiss, but reception was clearer when the headphones were plugged into the camera. Our reviewer was happy when the recorded sound came out much clearer than it sounded during monitoring.

2) Range

When we tested range from well over 200 feet away, the sound came out loud and clear. There was a noisy lawnmower working just 100 feet from the camera recording the action and you don’t hear it at all.

3) Other Notes

There are dials to adjust the signal level going from the transmitter to the receiver and from the receiver to the recording device (in this review, sound was recorded on the DSLR used, not a separate recorder).
With 16 channels to choose from, it’s easy to find one with minimum or no interference. To change channels you press the up/down buttons on the front of the unit – these don’t lock so it’s easy to accidentally bump the button and lose the signal.
The transmitter and receiver each run on 2 AA batteries that are easily accessed from the front of the unit.
The belt clip is quite stiff so a bit hard to attach to a belt or pocket. However as these aren’t ruggedly built, you’ll appreciate the belt clip’s aggressive grip so you don’t drop the transmitter.
Construction-wise, you get what you pay for here. It’s nearly all plastic. The parts seem well fitted together, however the antennae feel delicate. I wouldn’t want to sit on these or drop them, but they come with a foam-lined hard plastic storage case. To bring a lav system with these features to the market at this price, Polsen had to make some compromises. Fortunately they decided to go with good performing electronics in a cheap box, not the other way around.

4) Summary

The Polsen ULW-16 is a good entry-level lav system for the money, but not professional grade. It’s easy to use and delivers good sound, but you need to treat them delicately as they are somewhat fragile.
Here are the main pros and cons:
Pros
  • Good sound quality
  • Easy to use
  • 16 channels to find one without interference
  • Good distance performance
  • Plosives well-controlled
  • Line level output
  • Lightweight
  • Inexpensive
Cons
  • Easy to accidently change channel
  • Not weatherproof
  • Not durable – cheap plastic construction – flimsy antennae

Best Nikon Lenses for Landscape Photography

Best Nikon Lenses for Landscape Photography

What are the best Nikon lenses for landscape photography? After I posted my last article on “Best Nikon Lenses for Wedding Photography“, I have been getting many requests from our readers to also talk about lenses for photographing landscapes, nature and wildlife (another post on best Nikon wildlife lenses will be published soon). In this post I will not only talk about which Nikon lenses I believe are the best for photographing landscapes, but also when I use a particular lens, along with plenty of image samples from each lens. Please keep in mind that the information I present below is a personal opinion based on my experience so far, which is subject to change. No third party lenses are presented either, although some Zeiss, Sigma, Tamron and Samyang lenses are phenomenal for landscapes. If you have a favorite lens of yours for landscape photography that is not listed below, please feel free to add a comment on the bottom of the page with some information and links to pictures (if you have any that you would like to share).

1)Nikon 14-24mm f/2.8G

I want to start out with a lens that I have a love and hate relationship with. On one side, the Nikon 14-24mm f/2.8G is one of the sharpest lenses ever produced by Nikon. It has phenomenal optics (center to corner, throughout the frame and aperture range), beautiful colors, super fast autofocus and an extremely useful focal range for wide-angle photography. On the other hand, it is a heavy, bulky and expensive lens that cannot accommodate filters. Sadly, not just circular filters and filter holders but pretty much any kind of hand-holdable filter. Its round front element shape and the built-in lens hood just make it impossible to use filters. Sure, you can buy a filter holder system from Lee and other manufacturers for this lens to accommodate filters, but it is not cheap and you would have to purchase a set of large 150mm filters, so forget about using your existing filters. I really wish Nikon allowed us to use small replaceable filters close to the lens mount, just like on telephoto lenses and this lens would have been irreplaceable.
Nikon 14-24mm f/2.8G ED
If you do not heavily rely on various filters like I do, then you will never be disappointed with this lens – yes, it is that good. If ability to use filters is a must, the only other full-frame lens from Nikon I would consider would be the Nikon 16-35mm f/4 VRlens (see my Nikon 16-35mm VR Review). If you are a DX shooter, the Nikon 12-24mm f/4 is superb.
Here are some sample images from the Nikon 14-24mm f/2.8G:
Castle Tunnel
NIKON D700 + 14-24mm f/2.8 @ 24mm, ISO 800, 1/5, f/3.5
Windows
NIKON D700 @ 14mm, ISO 200, 1/80, f/10.0
Lighthouse
NIKON D700 @ 16mm, ISO 200, 1/500, f/10.0

2) Nikon 24-70mm f/2.8G

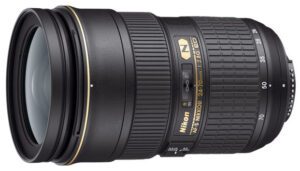
Year after year, the Nikon 24-70mm f/2.8G has been my #1 most used workhorse lens for landscape photography. While its performance is not as impressive as on the Nikon 14-24mm f/2.8G, especially in the corners at large apertures, it just needs to be stopped down to f/5.6 and smaller to unveil its true performance. It has a lighting quick AF, beautiful color rendering, extremely useful zoom range on full-frame cameras and it takes filters! But similar to the 14-24mm it also has a few problems – it is bulky, heavy, expensive and has no VR.
Nikon 24-70mm f/2.8G ED
Ever since the superb Nikon 24-120mm f/4 VR (see my Nikon 24-120mm VR Review) has been released, I have been thinking more and more about switching to it. I have not done it for one major reason: lens build and weather sealing. The Nikon 24-70mm is built like a tank and has suffered all kinds of abuse from me. I have dropped it, exposed it to sub-zero / extremely hot temperatures, used it in very windy and dusty environments, exposed it to extreme humidity and the list goes on and on…it has survived it all and it is still performing like a champ. I honestly do not think the 24-120mm would have survived all that.
I would not recommend it for DX shooters, because it has a not-so-useful 36-105mm equivalent focal length due to the 1.5x crop factor, so something like the Nikon 16-85mm VR would be a great low-cost alternative. I had a hard time picking my favorite images from this lens, because there are too many, so here are a couple from this year:
Glacier NP #8
NIKON D3S + 24-70mm f/2.8 @ 62mm, ISO 400, 1/8, f/11.0
Glacier NP #5
NIKON D3S + 24-70mm f/2.8 @ 28mm, ISO 400, 25/10, f/11.0
Mt Rainier NP #11
NIKON D3S + 24-70mm f/2.8 @ 32mm, ISO 200, 6/1, f/9.0
Most of the landscape wallpapers on this website have been shot with this lens. 

3) Nikon 70-200mm f/2.8G VR II

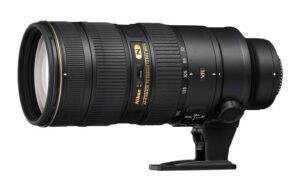
I’m sure you saw this coming – how could I not have the whole “lens trinity” with the Nikon 70-200mm f/2.8G VR II in this article? I was once approached by another photographer, who asked me what lenses I typically take with me when photographing landscapes. When I showed him my lenses and told him that I rarely leave without my 70-200mm, he was rather surprised. He thought that the 70-200mm was too long for landscape photography and asked me why I would even bother taking this bulky and heavy lens. I showed him a couple of pictures from the day before that I shot with the 70-200mm lens and right after he saw my images, he told me that he would buy it as soon as he returned home.
Nikon 70-200mm f/2.8G ED VR II
Landscape photography is not always just about capturing wide-angles and endless panoramas. I find myself often discovering interesting subjects that my 24-70mm is not long enough to capture and that’s when I switch to the 70-200mm to get close and tight. The Nikon 70-200mm is not just a portrait lens as you probably have come to known it – its optical performance is phenomenal for pretty much any kind of photography. The only thing you have to be careful about when shooting landscapes, is not to include any foreground elements that are close to you, or you will have a hard time getting everything in focus, unless your goal is to isolate a subject. The lens is ideal for shooting overlooks or other subjects from a distance. Every once in a while, I use the 70-200mm to shoot large panoramas as well. The only downside of this lens is its bulk and weight.
Here are some image samples of landscapes that I have shot with the Nikon 70-200mm lens:
Formations
NIKON D300 + 70-200mm f/2.8 @ 86mm, ISO 200, 1/1000, f/8.0
Waterfall
NIKON D3S + 70-200mm f/2.8 @ 145mm, ISO 100, 1/2, f/16.0
Glacier NP #15
If you have a DX camera, I would skip this lens and rather have a two lens kit comprised of the Nikon 16-35mm f/4 VR and Nikon 24-120mm f/4 VR, which would cover most of your needs. These two lenses are also great for full-frame cameras as a lower-cost alternative to the Nikon “trinity”.
S

4)Nikon 24mm f/3.5D PC-E

The Nikon 24mm f/3.5D PC-E is a special-purpose wide-angle tilt/shift or “perspective control” lens that is ideal for landscape photography. One of the biggest challenges of landscape photography is to bring everything from the closest foreground element to the farthest object in the background into perfect focus. While stopping down the lens certainly helps, you will often find yourself in situations, where you have to emphasize a foreground object by staying very close to it and yet stopping down the lens will not provide sufficient depth of field to capture everything in focus. In addition, stopping down lenses beyond f/11 on full-frame cameras and beyond f/8 on cropped-sensors cameras reduces image quality due to an optical phenomenon known as diffraction. Hence, it is often not a good idea to stop down too much. One option is to use a focus stacking technique, where you take a series of images focused at different points and then use post-processing software to combine those images. However, focus stacking only works well if your scene is very still and none of the objects are moving, so wind and immediate changes in ambient light could spoil the result.
Nikon 24mm f/3.5D PC-E
By using a tilt/shift lens, you can tilt the focus plane in such a way that you could bring the entire scene in perfect focus even at large aperture values. The lens physically tilts up, down, left and right to give you full control over depth of field. There are several potential issues with using this lens. First, it is a manual focus lens. Second, it is a fixed focal length lens, which means that you will have to move around to compose your shot. Third, it only properly fits pro-level DSLRs like Nikon D700 and Nikon D3s and has limited movement on smaller DSLRs. And finally, it is not an easy lens to use and you will have to learn how to properly use the tilt/shift capability and compute depth of field depending on the tilt position. Once you master this lens, it is hard to find anything else that could beat it. Needless to say, its sharpness, contrast and colors are top notch.
Here are some of my image samples from this gem:
Sample #10
NIKON D700 + 24mm f/3.5 @ 24mm, ISO 800, 1/25, f/8.0
Sample #1
NIKON D3S + 24mm f/3.5 @ 24mm, ISO 200, 1/160, f/10.0

5) Nikon 24mm f/1.4G

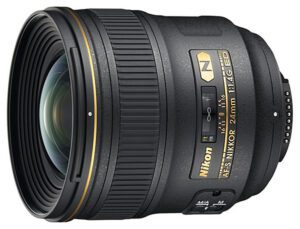
If you are looking for the sharpest lens Nikon has ever produced, check out the Nikon 24mm f/1.4G – it is practically flawless in terms of optical performance. This is one lens that I would not hesitate using on any camera body, even the upcoming high-resolution full-frame Nikon DSLRs, because it is one of those lenses that will out-resolve any sensor out there. Aside from its astounding sharpness, contrast and colors, it has a very wide aperture range from f/1.4 to f/16, giving you the versatility to use it for multiple photography needs – from landscape photography to portraiture (especially low-light situations).
Nikon 24mm f/1.4G
Some photographers initially complained about autofocus issues with this lens, but I believe that they might have gotten some bad samples from the first batch, because I have shot with three different samples by now and I did not have any AF problems whatsoever. Lola and I rely on this lens quite heavily for our photography work. Here are some image samples from this beautiful lens:
San Juan Streets
NIKON D700 + 24mm f/1.4 @ 24mm, ISO 200, 1/200, f/8.0
Ocean View
NIKON D700 + 24mm f/1.4 @ 24mm, ISO 200, 1/250, f/8.0
Beach at Night
NIKON D700 + 24mm f/1.4 @ 24mm, ISO 3200, 1/8, f/2.0
Great Sand Dunes Sunset
NIKON D3S + 24mm f/1.4 @ 24mm, ISO 200, 1/125, f/10.0
Please let me know if you have any questions!

How to Wet Clean Your DSLR Sensor

This wet cleaning process is easy, because I use ready-to-go tools (sensor swab + fluid) from Visible Dust. It is certainly not a cheap product, given the $3 cost of each swab, but it does a good job of keeping your DSLR sensor clean when compared to other solutions out there. Either way, the below process is much cheaper than sending your camera for $50 or more every time you need the sensor cleaned. As a photographer, you should learn how to do this yourself.

In the video, I mention that you should only use a swab once. You can also use the other side of the swab, but you might end up putting the dust back on the sensor if you don’t keep the swab properly angled. I find that it is best to use swabs once, but you might get better results. When inserting the swab, tilt it horizontally first, so that you do not touch the top and bottom parts of the chamber. Don’t forget to do the same when removing it. You might find some dust specs on the side of the sensor, where you picked up the swab. If those specs do not disturb you, just leave them there. If they do, then you have two choices – either to use corner swabs or a sensor brush to pick up those remaining dust specs. I personally do not worry about them unless the dust particles are huge.
I know that some people will try to reuse the swabs, but I highly recommend NOT to do it. Do not try to wash and dry the swabs either – this particular product is designed for one time use only. Trying to wash and reuse the product might introduce other nasty stuff besides dust on your sensor. You have been warned!