Lightroom 6 Announcement and Preview
Two new versions of Lightroom are immediately available for both standalone and Creative Cloud subscribers. Lightroom 6 will be offered as an update to Lightroom 5 for perpetual users (both regular and upgrade licenses are already available) and those who subscribe to the Creative Cloud will get a cloud-specific version called Lightroom CC (which in its core is the same as Lightroom 6). This update is a rather significant one, because it brings very important and much-needed performance improvements, new camera / lens support and a few new notable features. Let’s discuss those in more detail now.
So what has changed since Lightroom 5?
New Features
Lightroom 6 comes with a rather short, but very sweet list of features. Let’s take a look at these in more detail:
Panorama Merge
I listed this one first, because this feature alone is worth the upgrade for me and I am sure many others! Basically, instead of selecting files in Lightroom and going into Photoshop to merge panoramas, you can now do it directly in Lightroom without ever opening Photoshop. If you thought that was the coolest part, you guessed it wrong. The coolest part, is that the Panorama Merge file generates a DNG file, or Adobe’s RAW file, instead of a flat TIFF file that Photoshop generates. What does it mean? It means that you now no longer need to fiddle with those massive TIFF files that you can no longer properly edit in Lightroom – instead, you are still retaining all the editing capabilities within Lightroom. So you can edit these merged panoramas the same way you can edit RAW files before you have them merged. I have already played with this feature and I will be honest – it looks darn good! It might not have the full versatility of some of the third party Panorama editing tools, but I tried merging a couple of panos from my last trip to Death Valley and those panos stitched perfectly. Take a look at the below stitched panorama:
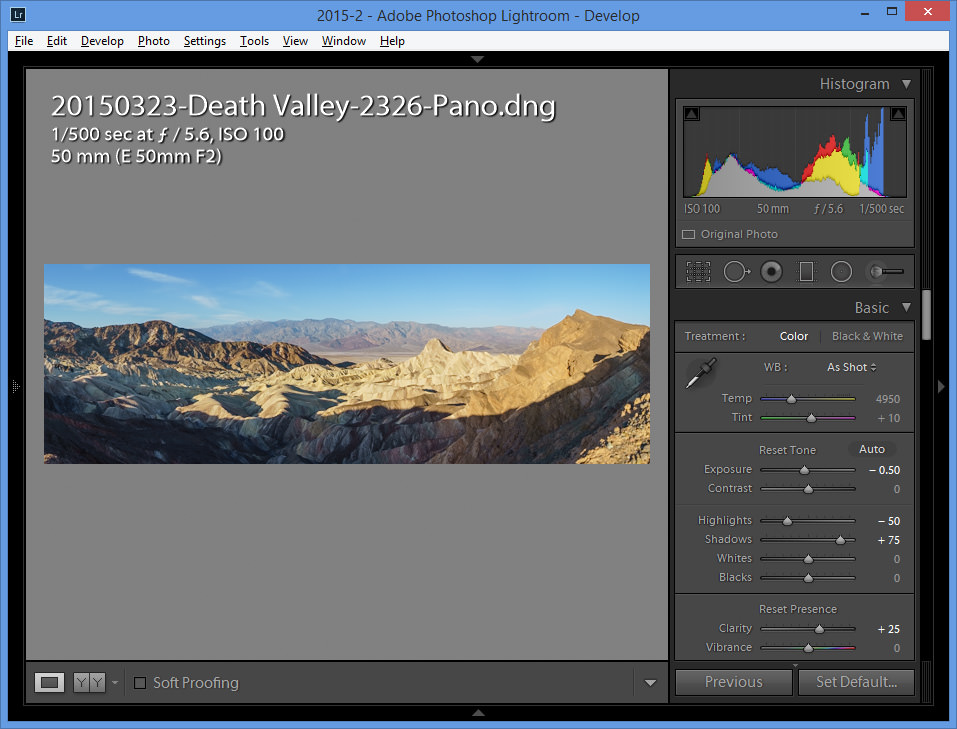
Note the right side of the Develop module – I made those changes before I merged the panorama and as you can see, those changes are still there. I tried experimenting with further processing and I was quite shocked to see that the changes were working just like they work when I edit RAW images. Finally, Adobe is making DNG what it was supposed to be in the first place – a versatile format that allows merging RAW files without losing any data. Kudos to Adobe engineers for implementing this much needed feature! I will be covering the Panorama Merge tool in detail in my upcoming review of Lightroom 6, so stay tuned to see more.
HDR Merge
HDR photographers will be also very pleased to see an HDR Merge tool, also built right into Lightroom. This is another huge update and works very similarly as the above-mentioned Panorama merge tool, since it retains a full DNG file that contains all the RAW data for you to be able to manipulate further on, once your bracketed files have been merged. Although I am not a big fan of HDR (I have a severe distaste for “Grunge HDR” and rarely like the look that contains little highlight/shadow definition), the HDR feature within Lightroom seems to produce quite pleasing results that do not look overdone. I have not experimented with this a lot yet, but I am looking forward to seeing what can be done with this feature in Lightroom, and whether it is something I will be looking at for my personal and professional needs. Here is another screenshot which shows a merged HDR from three RAW files:
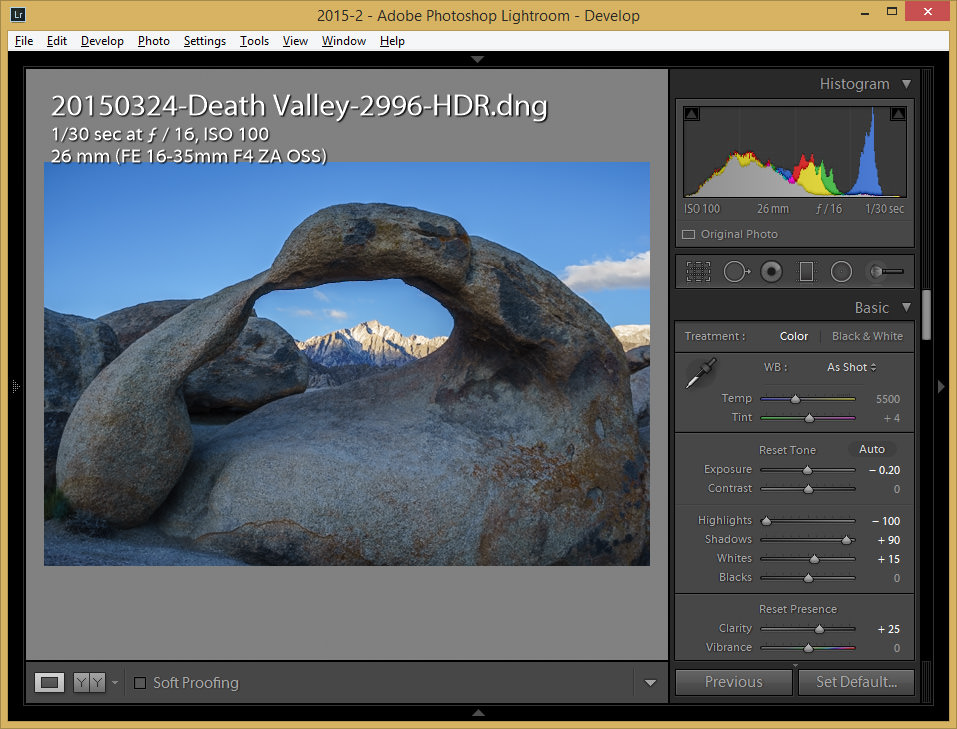
Again, you can see that the sliders in the develop module are there for me to play with. Interestingly, although I have not made any modifications to the RAW files, Lightroom already applied some adjustments to make the merged HDR look better.
Filter Brush
This is another huge addition for those of us that edit in Lightroom heavily – the new Filter Brush. This one is really neat, because you can actually use a tool like the Graduated Filter to drop it into an area, but then use the filter brush to erase parts of the image that you do not want affected with the filter! This feature is another biggie for me that makes it worth upgrading to Lightroom 6. No more fiddling with separate brush tools to edit your images where there is an object in between the affected areas. So if you rely on something like the Graduated Filter a lot and you wish it did not touch that tree, rock or the mountain, you can now erase parts of the selected area. Take a look at what I did in the below image:
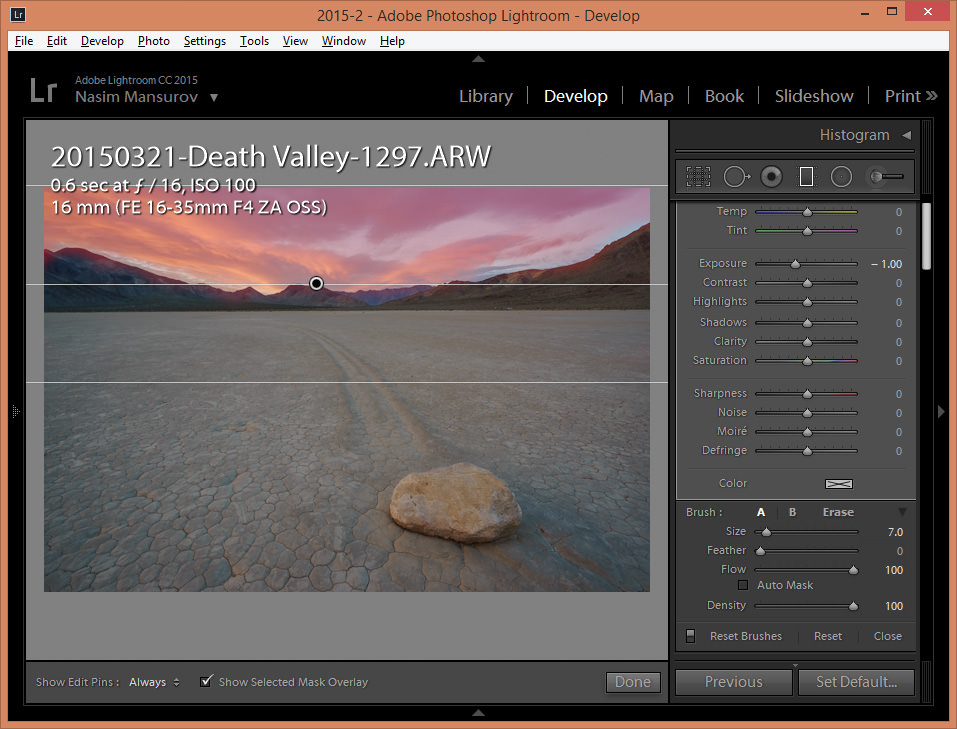
Yup, that’s a Graduated Filter, with an eraser applied to the affected mountain regions that I do not want touched. This is something I have been wanting for years, but I never thought it was possible to actually implement it. What a great and very much needed feature for landscape, architecture and portrait photographers!
Face Recognition
Another new feature is face recognition and this one is also interesting, because you can draw a face recognition area on your subject, name the person and Lightroom will automatically scan through your Lightroom library and show each image where the person shows up. I tried this with my daughter Jasmine:
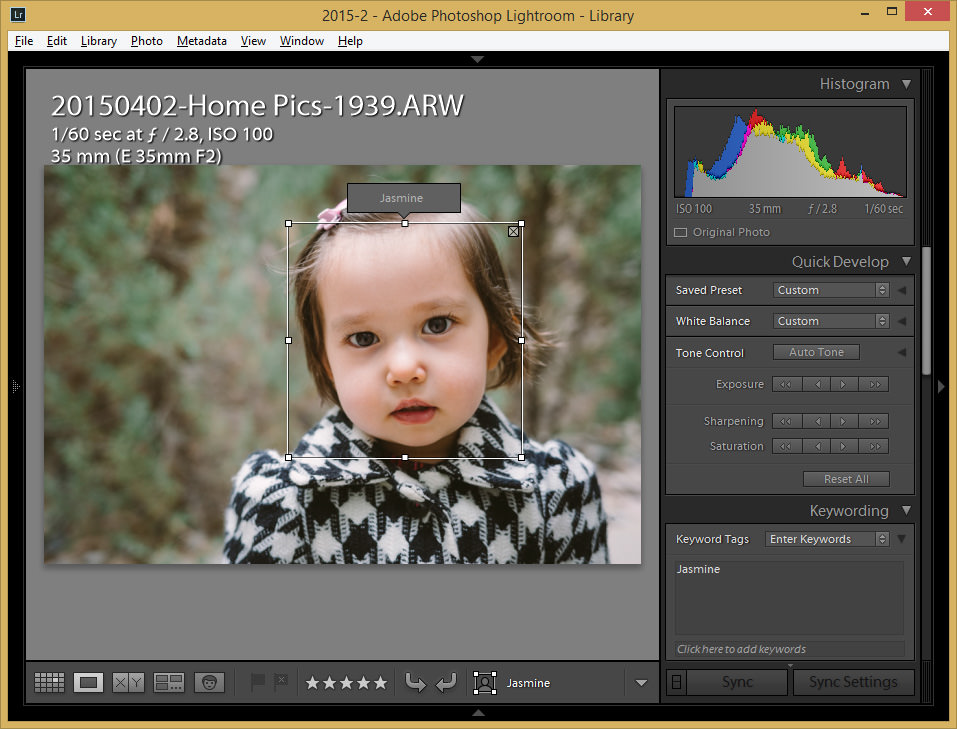
Then I had Lightroom scan through the entire catalog and look for faces. I was pretty impressed with the results – the software did indeed find a lot of faces. Once I identified some of them, it then automatically tagged and group them and for the images where it was struggling to identify for sure, it gave me a suggestion on the bottom of the image, as seen below:

Now that’s pretty cool! Now you can easily tag people in your catalog and with a couple of clicks you can find them in your images. No more scrolling through thousands of images to find that one photo of your family member, friend or model!
The software is not perfect and you will see some false positives. But you can click the “X” button to make those false positives disappear and the software will move on to the next image.
Advanced Video Slideshows
You can now combine still images, video and music, then add effects like pan and zoom to slideshows:

I will go over this in more detail in the upcoming review.
Performance Improvements
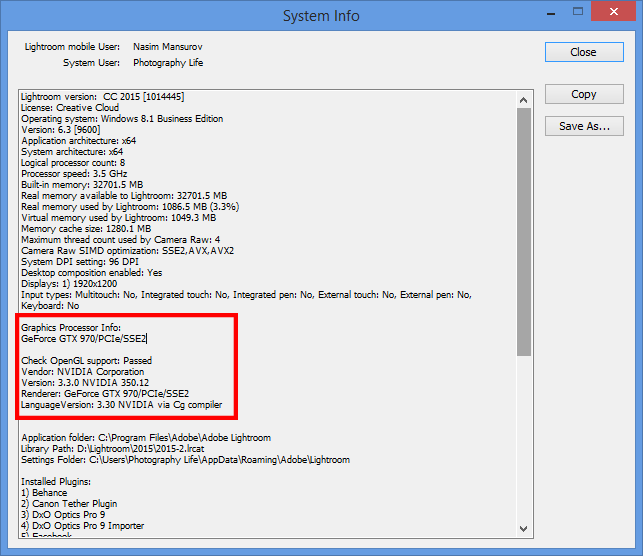
All this is great, but the icing on the cake is Lightroom’s performance improvements. And I am not talking about minor improvements – my biggest complaint with Lightroom being unbelievably slow on my fast PC has been finally addressed, because folks at Adobe finally incorporated GPU acceleration right into Lightroom. Now my fast NVIDIA GeForce and Quaddro video cards can actually help render Lightroom screens faster and the difference is like night and day. Everything feels faster and more responsive than ever. Take a look at the System Info screen from my secondary PC, where you can see that Lightroom recognized the NVIDIA GeForce 970 video card and shows OpenGL support:
Don’t underestimate GPU support, because using tools within Lightroom’s develop module is now MUCH faster on my PC. Whether I am using the crop tool, spot removal or any of the brushes, everything appears lightning fast compared to how it used to be before. In fact, after using Lightroom 6 for a few hours today, I literally cannot stand Lightroom 5 anymore – that’s how big the difference feels for me.
Please note that the generation of thumbnails and other processes that access files might not have improved significantly, as those still depend on how fast your hard drives are and how big your RAW files are in your system.
Lightroom Mobile
Along with the above changes, Adobe also rolled out updated to Lightroom Mobile, so you can now combine the power of Lightroom desktop with an app on your tablet or your phone. If you have been happy with these apps, then you will probably be excited about them, but I personally have not fully explored this area yet to see how practical it is for my needs. I will be looking at this in closer detail in the future and will provide some updates if there are some big benefits.
Upgrading
The upgrade process is pretty straightforward. If you are already a Creative Cloud subscriber, all you have to do is close the Adobe Creative Cloud application and reopen it and you will see all the updates, including Lightroom CC. If you do not own a copy of Lightroom, . If you own a Lightroom 5 license and want to upgrade, go to this page, then once full version of Lightroom is added to the cart, click “Edit”, change Full to Upgrade, select your current version of Lightroom and then click “Save”. As before, upgrade is priced at $79.
If you upgrade, let us know what you think about the new version of Lightroom. I would be very interested to see if you experience performance improvements with the new version compared to the previous one!


0 comments: