The Importance of Straightening The Horizon and Aligning Lines
One of the most common mistakes I see when reviewing images submitted by our readers, or when reviewing portfolio images during our workshops, is a rather simple case of crooked horizons or badly aligned lines. Although most photographers are very well aware of this one, for some reason many simply fail to see such problems in their images. Now it is one thing when an image is tilted intentionally to create an interesting composition, and totally different when the photographer is not paying attention to or is unaware of the surroundings and background elements that are part of their photographs. In this article, I will demonstrate examples of crooked horizons and badly aligned lines, how they can be easily fixed in post-processing software like Lightroom, and talk about the importance of lines in composition.
1) Why Lines Are Important
Why are horizons and lines important in photographs? Because we as human beings generally prefer straight, leveled lines instead of odd angles. Think about it. When you hang a photo in your living room, why do you want to perfectly align it with the ceiling, your floor or your furniture? Why does your TV or your computer monitor stay on a flat surface or hung perfectly aligned on the wall? Why do we have so many objects with the right angle? That’s because we like things straight and if things looked crooked, it throws our sub-conscious perception out of balance. We seek visual balance in everything we do, including photography. That’s why looking at a photo with a crooked horizon does not feel natural. We have a built-in ruler in our brains that makes us want to tilt our heads to try to align those lines.
Therefore, it is always a good idea to pay close attention to your scene, its surroundings and backgrounds, not just your main subject. And this applies not just for landscape or architectural photography – I apply it for photographing people and wildlife as well, as demonstrated below. So in a way, it is a universal rule.
1.1) Portrait Photography Example
Take a look at the below bridal photograph. I opened the unprocessed RAW file, then drew red lines on top of the lines that needed to be fixed:
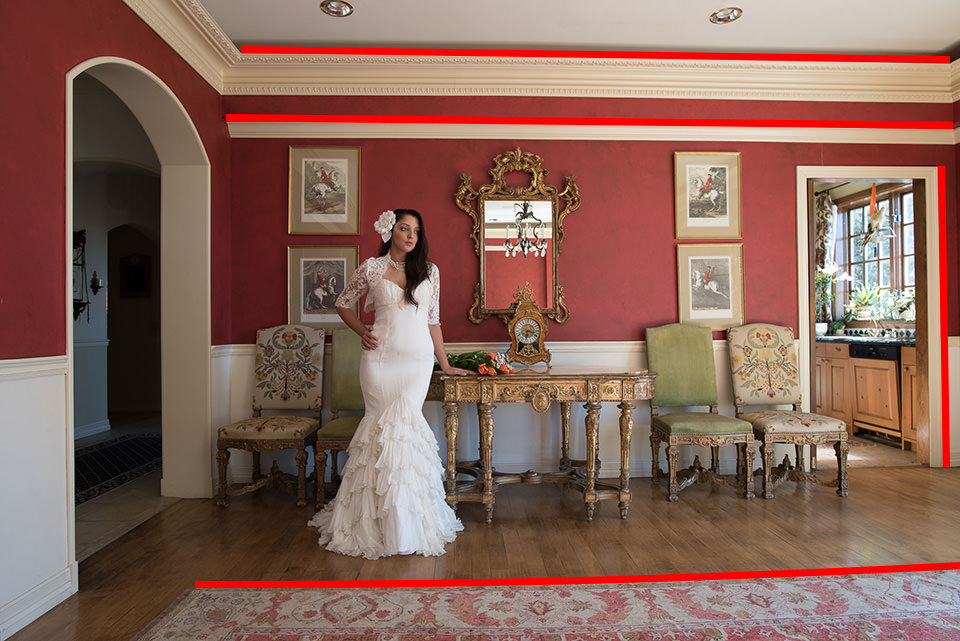
Straight Out of Camera: NIKON D750 + 20mm f/1.8 @ ISO 720, 1/40, f/5.6
While it is a nice photo, looking at the horizontal ceiling lines and the carpet, we can clearly see that the image is distorted and the lines running from left side of the frame to the right appear tilted. There was nothing I could do in my camera, because it was the combination of the lens focal length and its distortion properties that were distorting the lines and I did not want to change my or model’s position. After a couple of minutes in Lightroom, I was able to fix the tilted lines with a few clicks. Next, I gave a boost to colors and removed unwanted objects in the shot and I ended up with the following shot:
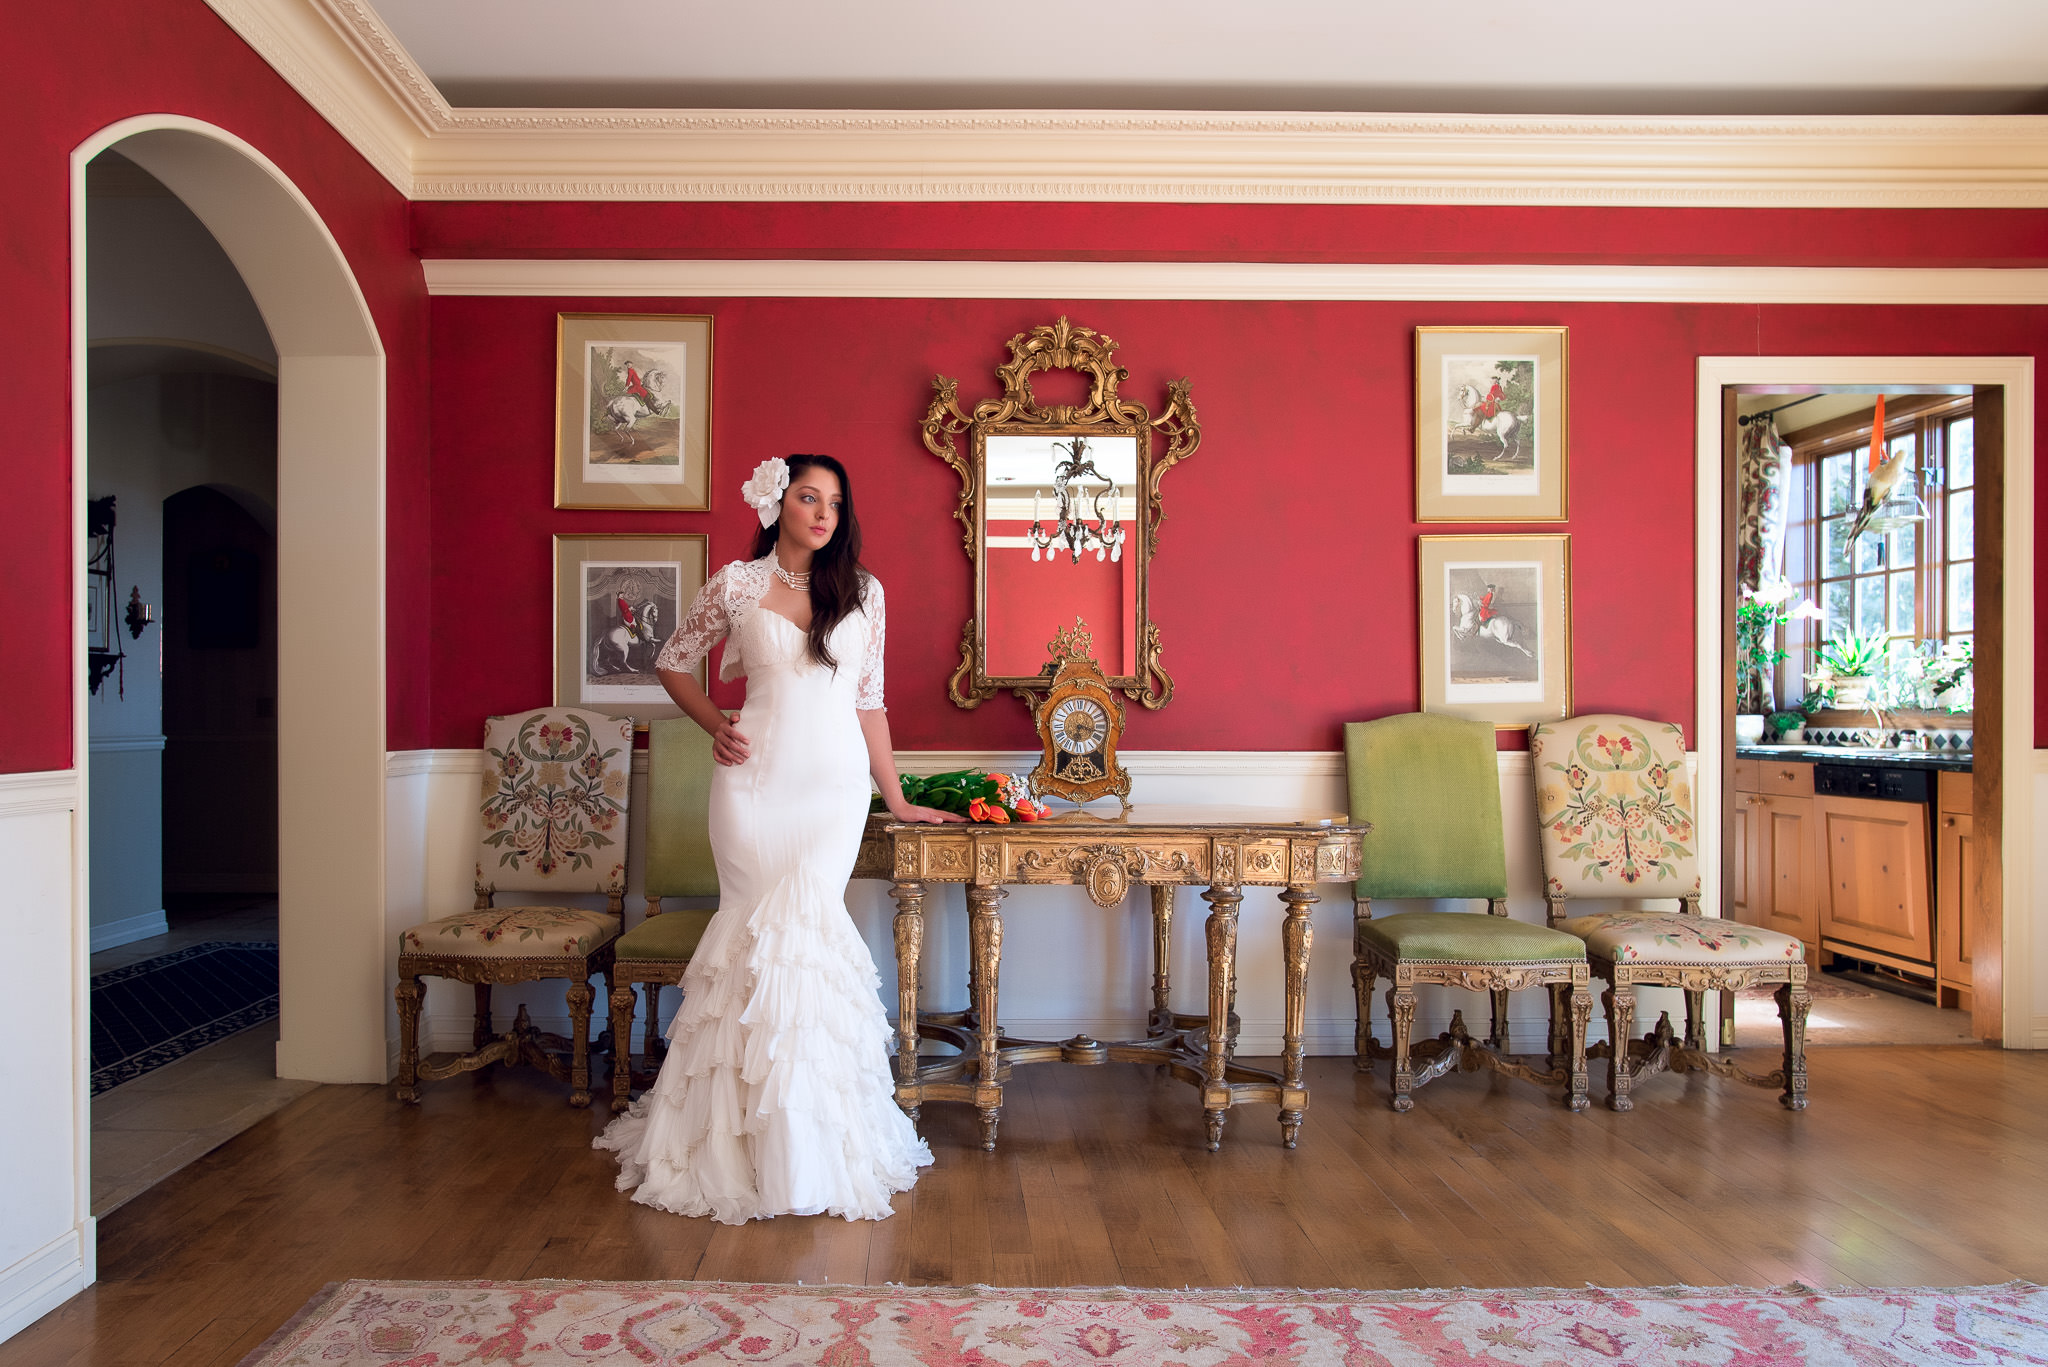
After Lightroom Adjustments: NIKON D750 + 20mm f/1.8 @ ISO 720, 1/40, f/5.6
Now the image looks much better and strikes a better visual balance. I lost a little bit of the image as a result of these corrections, but the lines now look straight and parallel, giving me a good balance of vertical and horizontal lines.
1.2) Landscape Photography Example
Let’s take a look at another image and this time we are dealing with a curvy and crooked horizon of a seascape. Again, the below shot is unprocessed RAW:
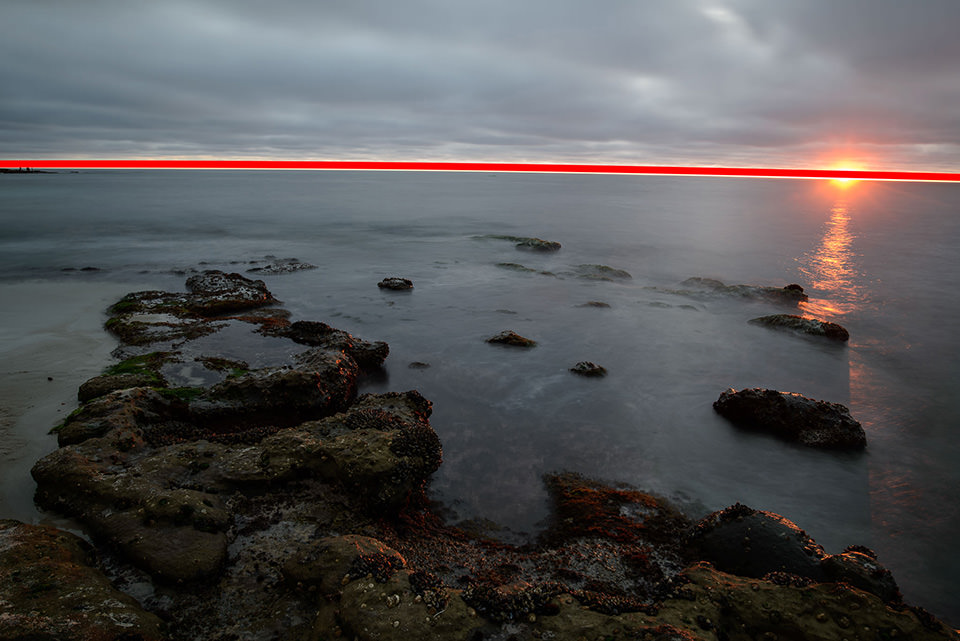
Straight Out of Camera: NIKON D800E + 18-35mm f/3.5-4.5 @ ISO 50, 15/1, f/8.0
Although I did my best to keep the horizon leveled, it is pretty clear that the horizon is not only tilted, but also appears a bit curvy thanks to the barrel distortion exhibited by the lens. Here is the same image with the fixed horizon after I made some adjustments
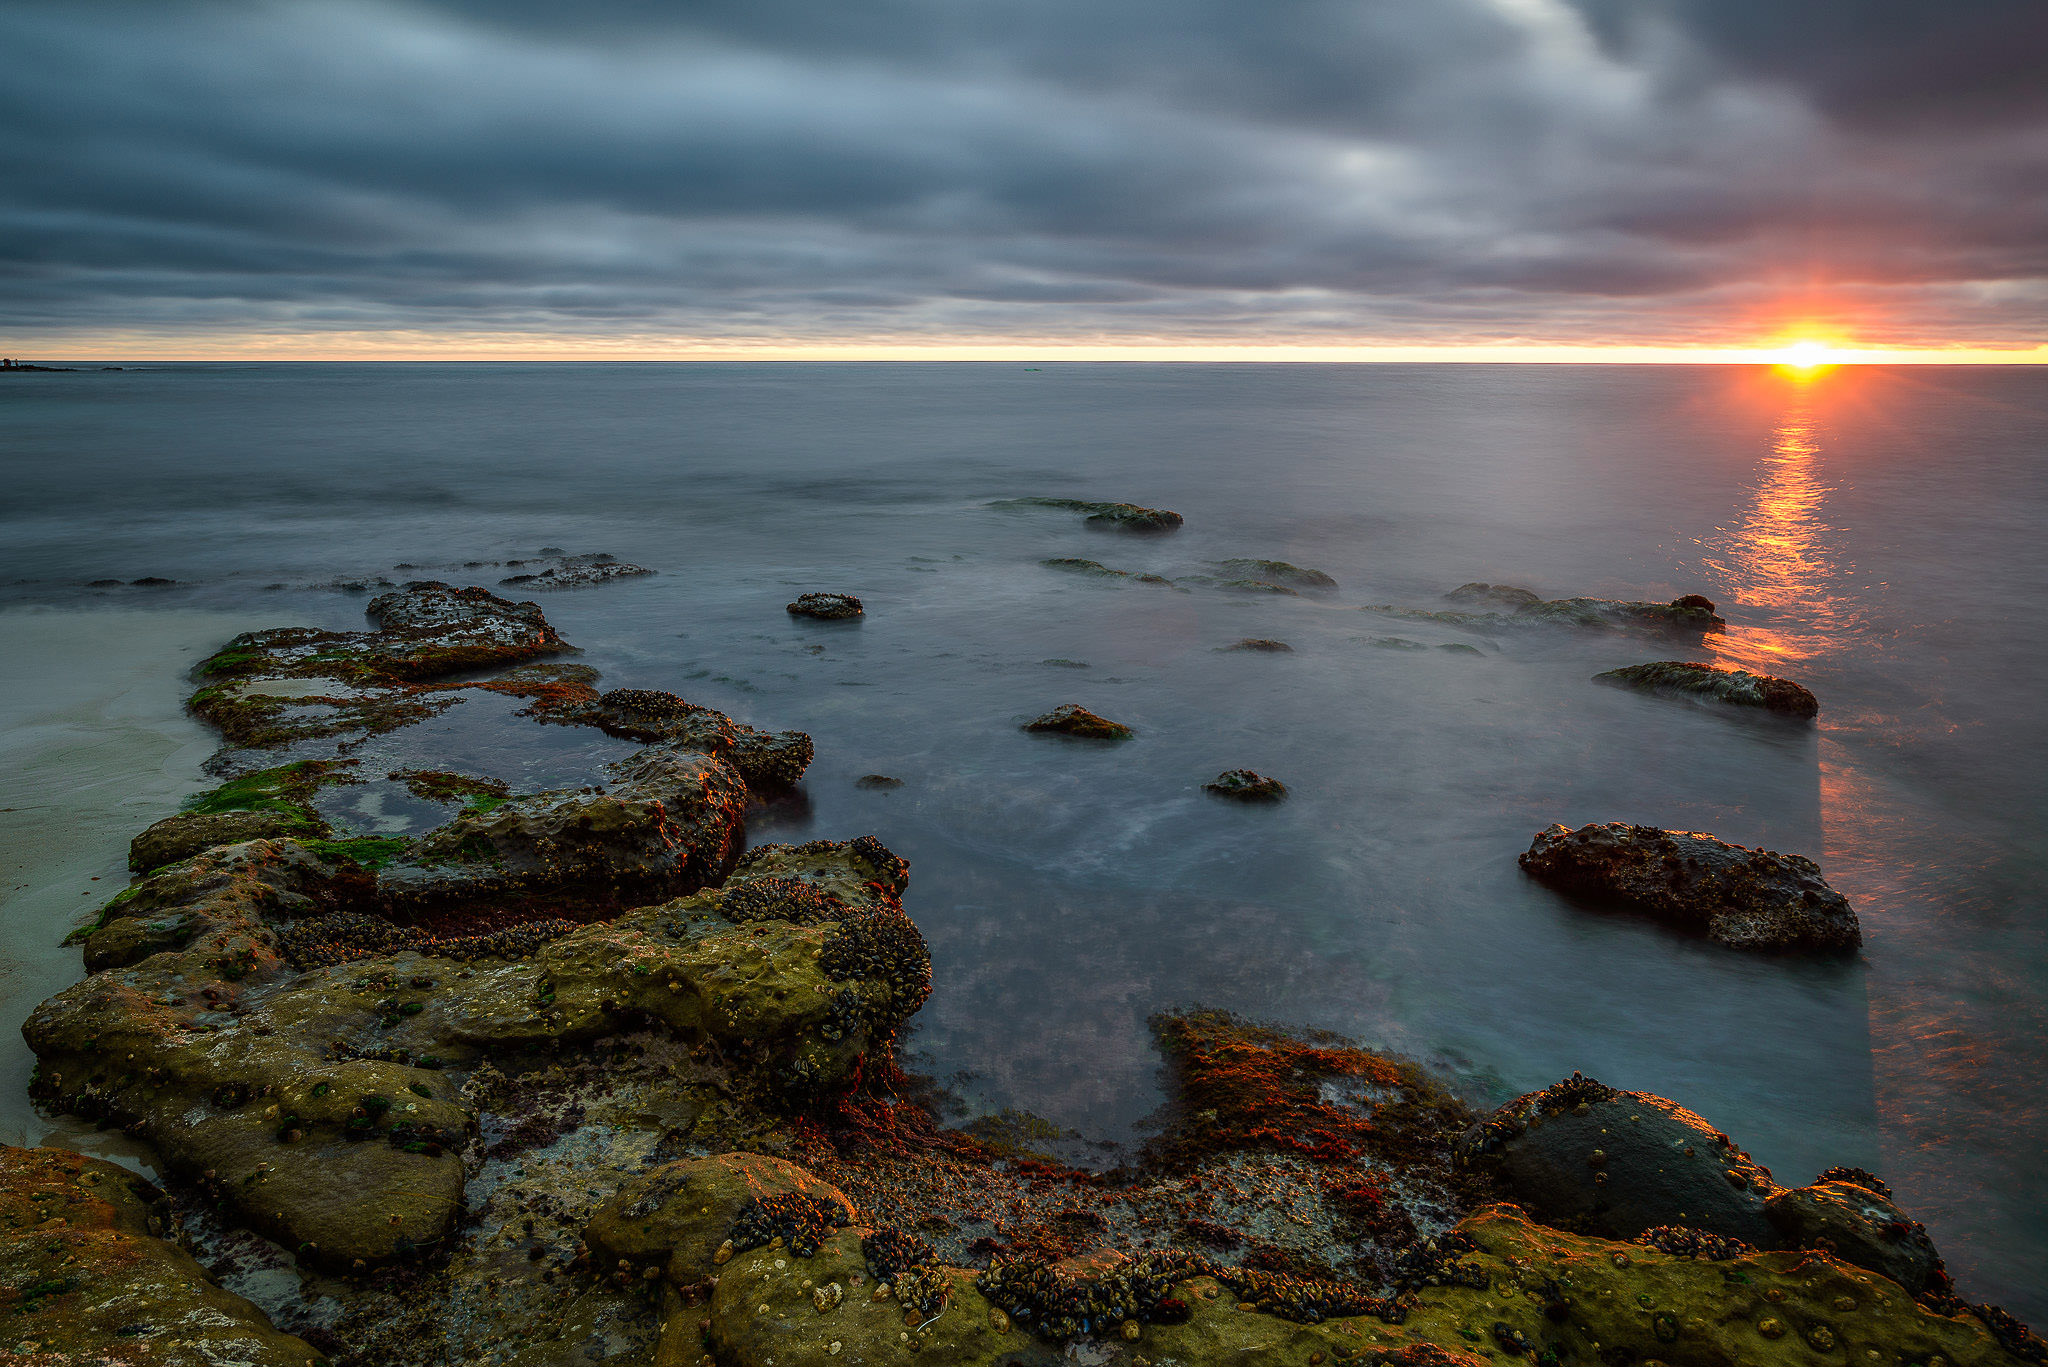
After Lightroom Adjustments: NIKON D800E + 18-35mm f/3.5-4.5 @ ISO 50, 15/1, f/8.0
Now that looks much better. If I had not straightened and aligned the horizon properly, the image would not have had the same balance as it does now, even without any color adjustments.
1.3) Architecture Photography Example
Here is an example of a glass building that shows tilted horizontal lines:
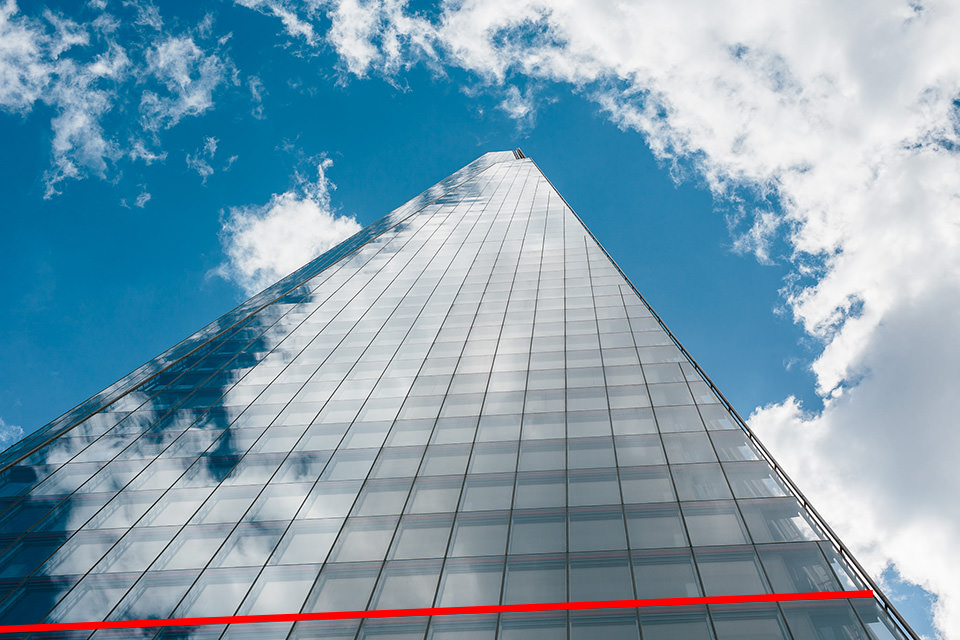
Tilted Lines: Canon EOS 6D + 50mm @ ISO 100, 1/1000, f/5.6
The image appears unnatural this way, because every horizontal line is impacted by the visible tilt. And here is the same image, with the properly aligned horizontal lines:

Properly Aligned Lines: Canon EOS 6D + 50mm @ ISO 100, 1/1000, f/5.6
Just a subtle change in tilt and the image now appears much more balanced.
2) How to Find and Align Lines / Visual Guides
There are situations, when it can be tricky to identify the horizon or the lines by which the scene needs to be adjusted / aligned. Sometimes those visual guides simply do not exist. What do you in such situations? If the image achieves good visual balance without any lines, then sometimes you do not have to worry about any of that. However, in many cases, visual guides are there, but they are hard to find and identify. Let’s go over some examples where such visual guides might not be immediately visible to your eyes
2.1) Engagement Session Example
In the below sample image of an engaged couple, we have multiple elements that form different lines – the fence and the kissing couple that are standing at an angle. We also have vertical trees and the hard to see horizon line in the background. Which do we use as visual guides?
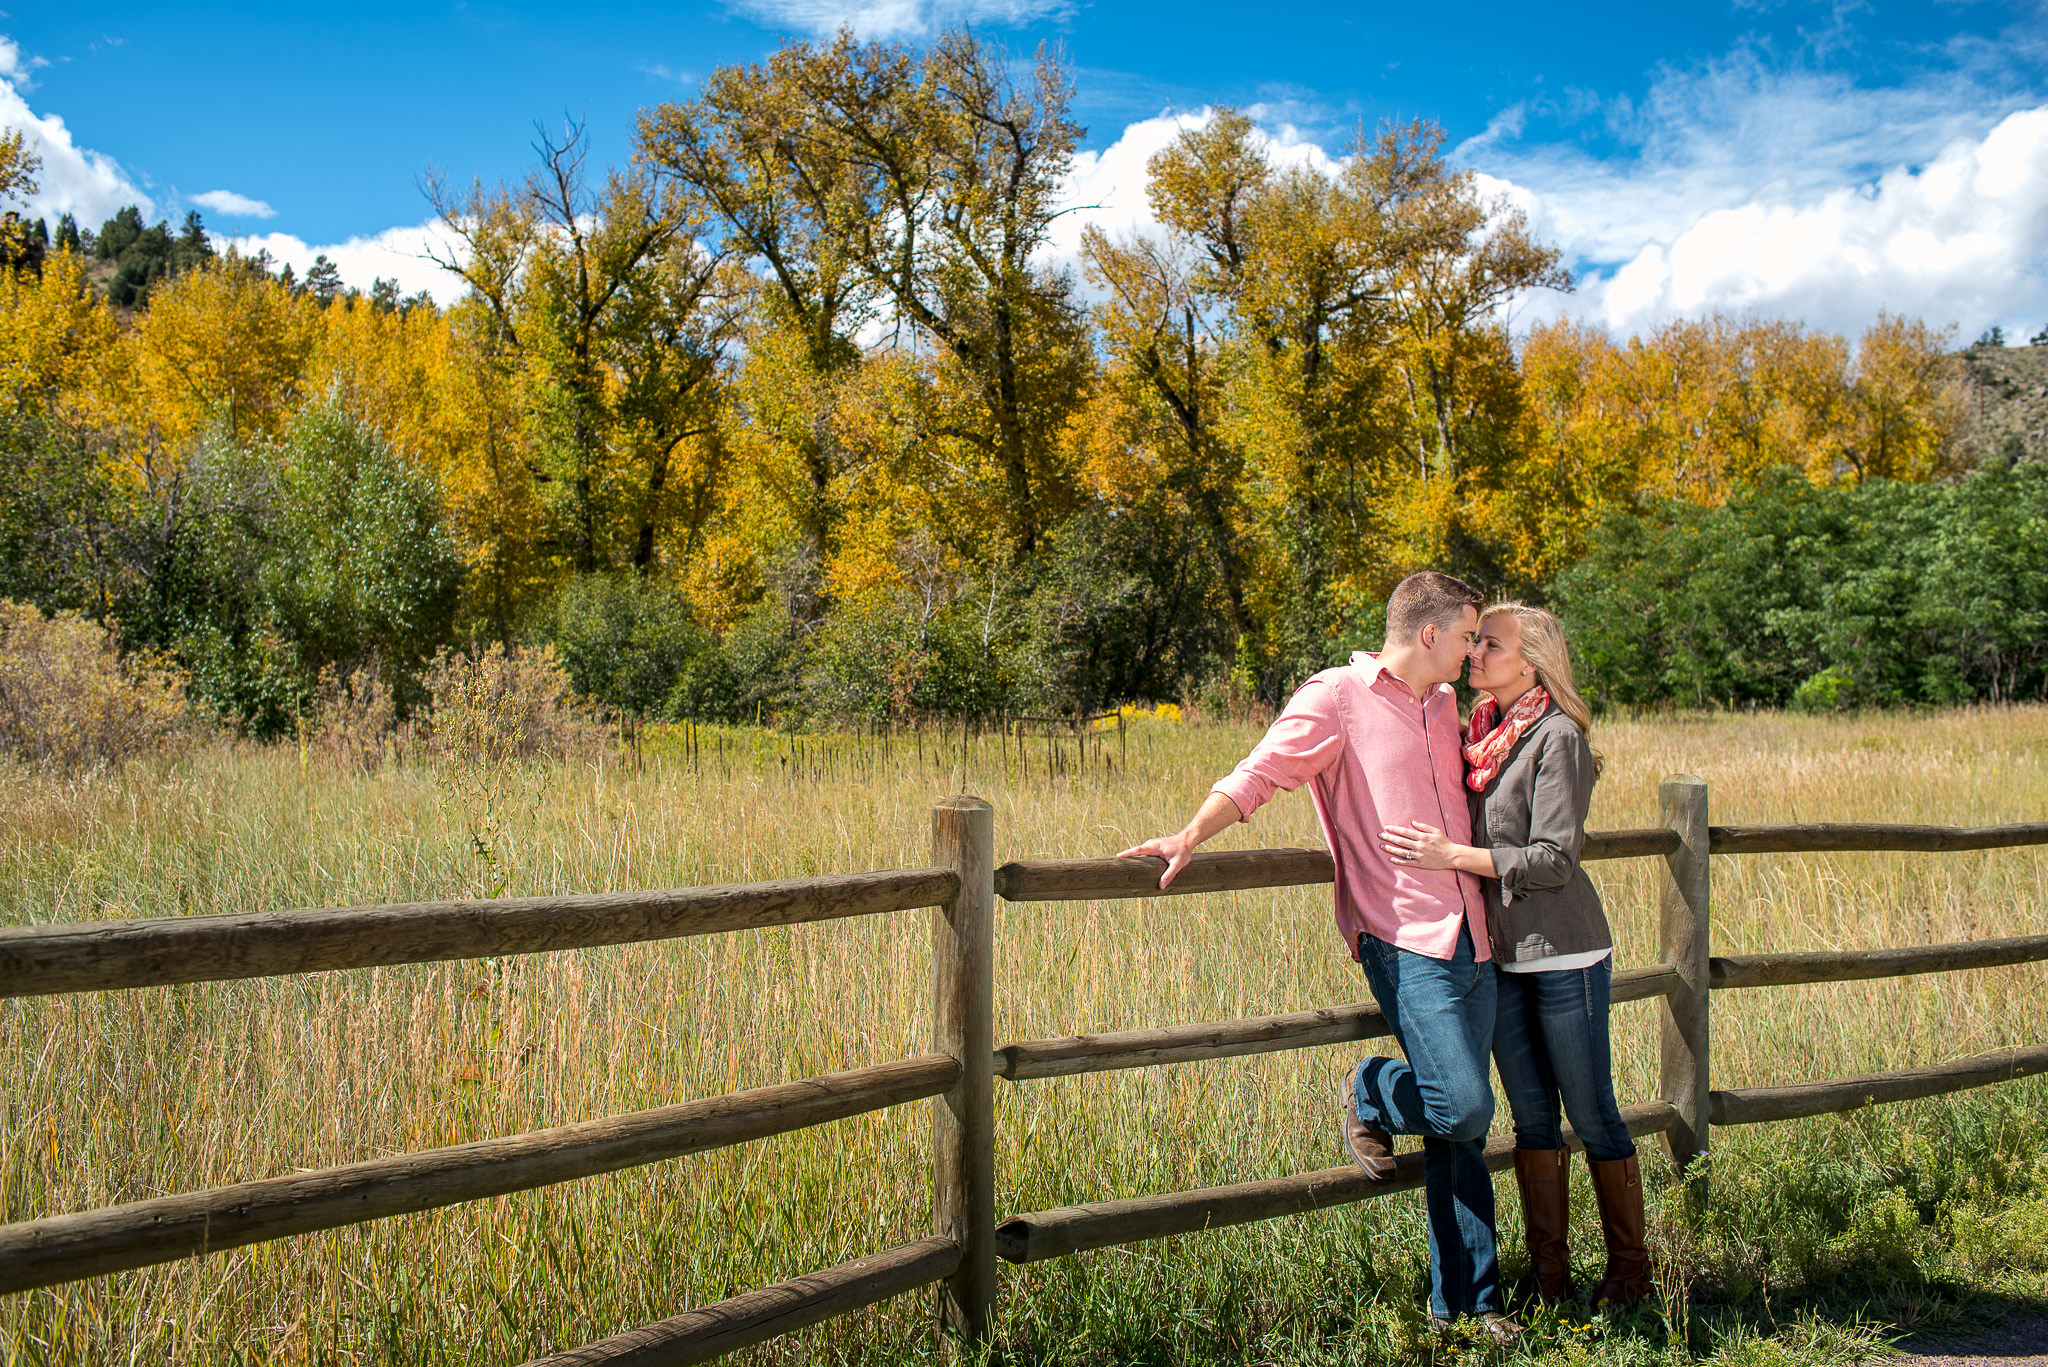
NIKON D750 + Zeiss Distagon T* 2/35 ZF.2 @ ISO 50, 1/320, f/5.6
It should definitely not be the fence or the couple, as they are only one part of the overall landscape. So when I was framing this shot, I used the trees and the horizon as my visual guides, as shown in red:
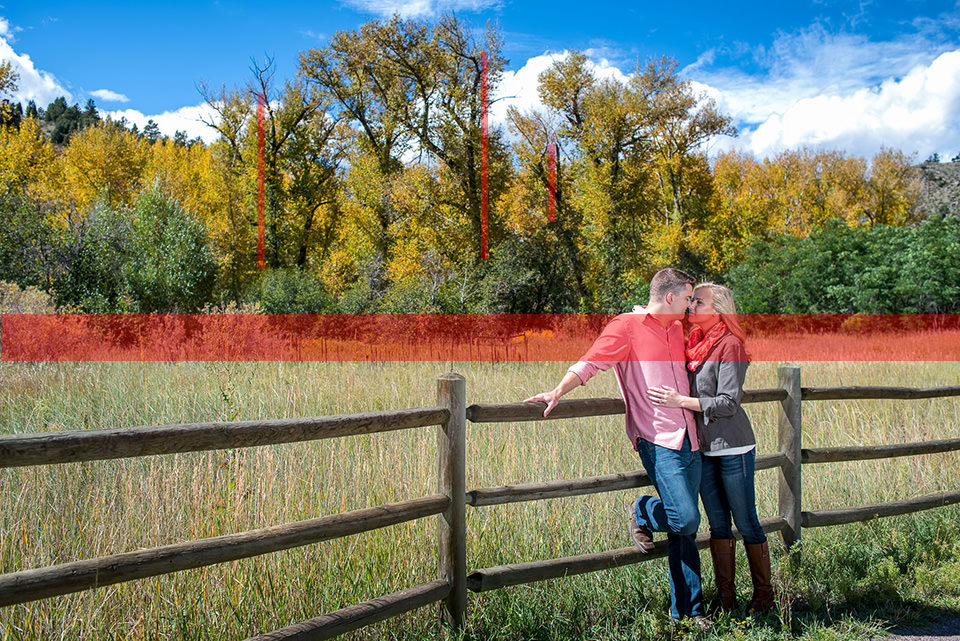
NIKON D750 + Zeiss Distagon T* 2/35 ZF.2 @ ISO 50, 1/320, f/5.6
2.2) Landscape Example #1
Here is a sample image of a landscape that contains multiple elements, but has no clearly defined horizon line. Which elements would you pick for alignment?
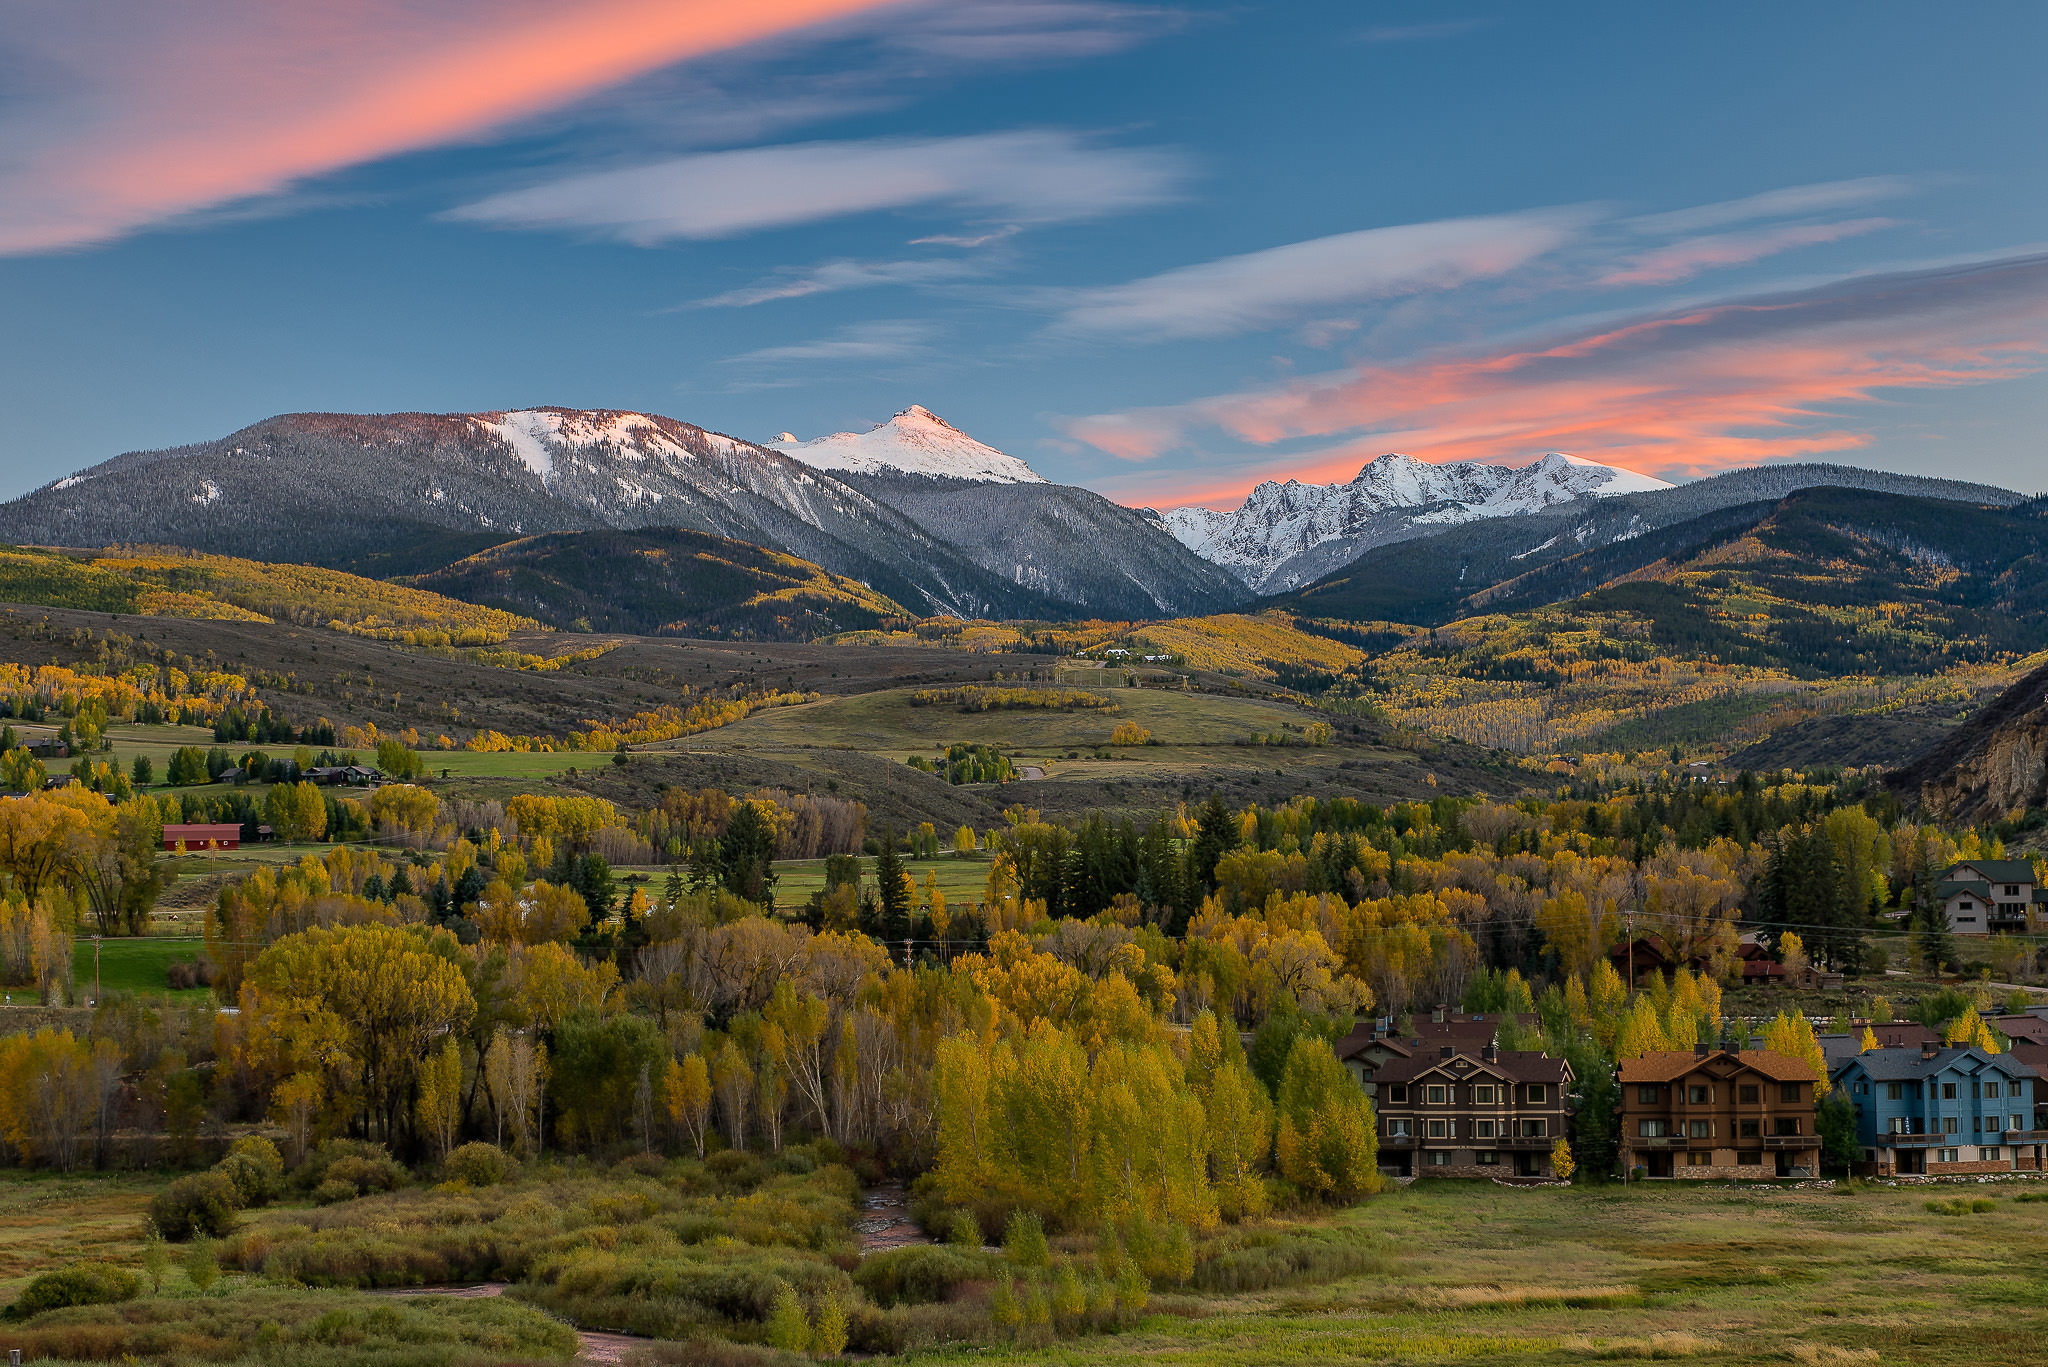
NIKON D750 + 24-70mm f/2.8 @ ISO 100, 1/3, f/5.6
When framing this particular shot, I used the houses on the bottom of the frame, the trees on the left and the mountain line to properly align the image:
NIKON D750 + 24-70mm f/2.8 @ ISO 100, 1/3, f/5.6
2.3) Landscape Example #2
This shot is a tough example, because there are so many different lines in the scene that are heavily tilted:
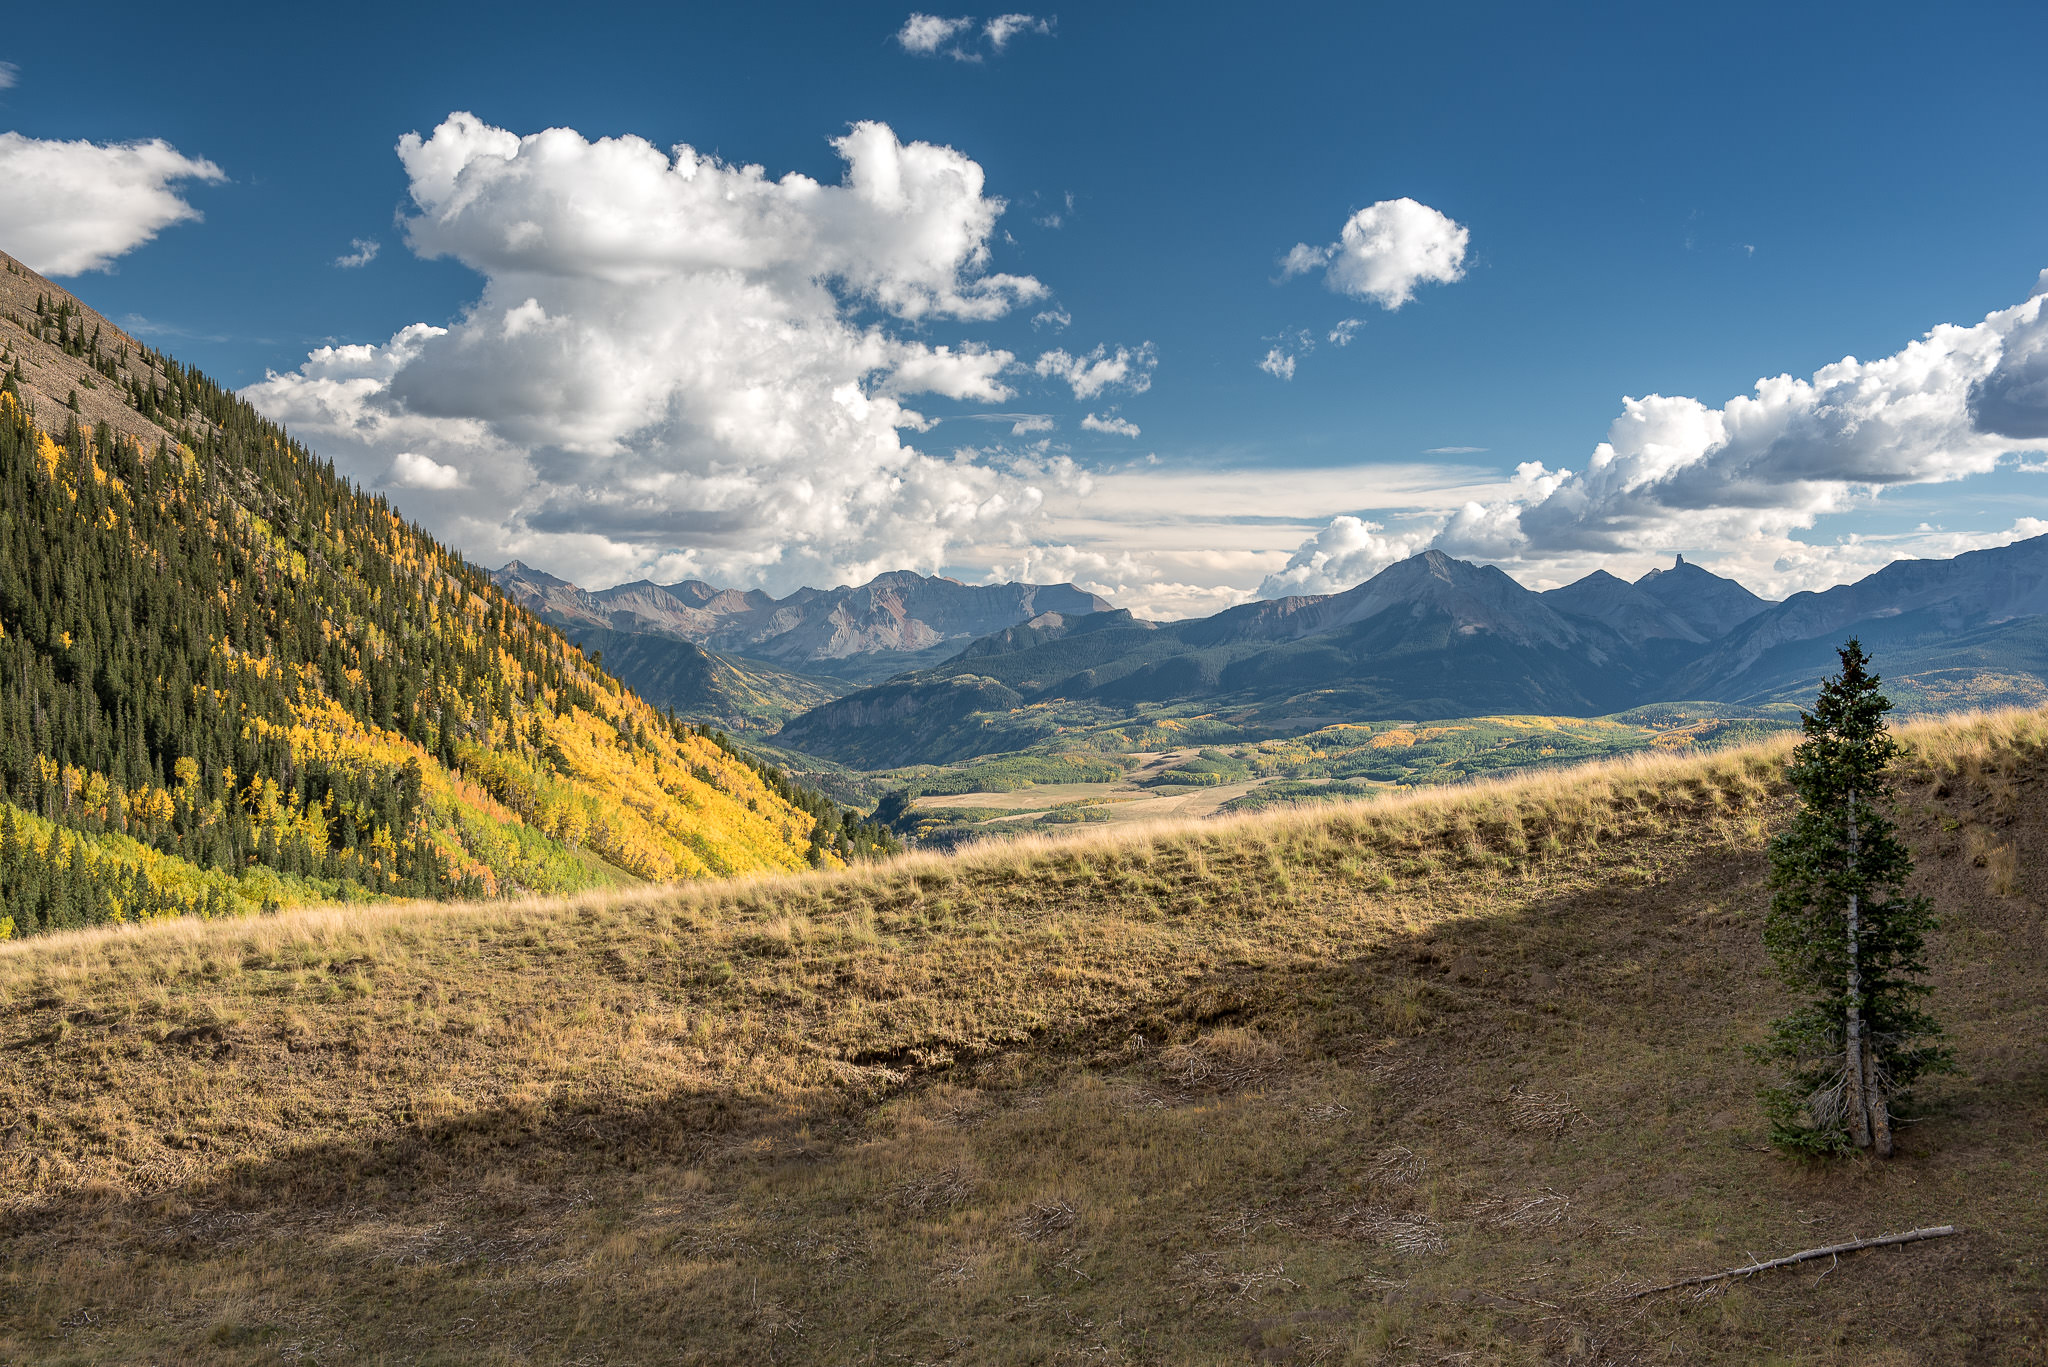
NIKON D750 + 24-70mm f/2.8 @ ISO 100, 1/80, f/5.6
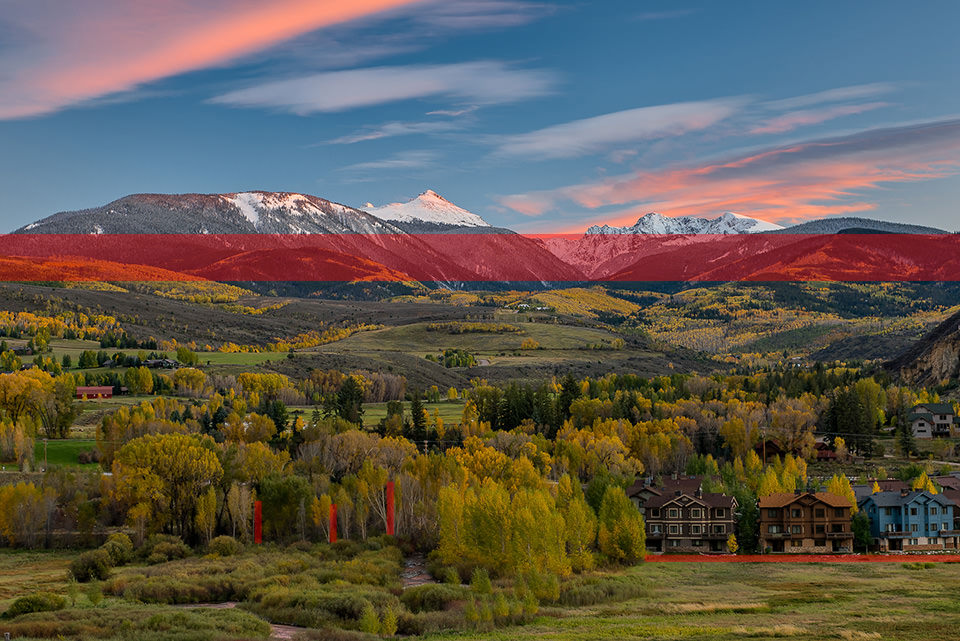
I used two elements in the scene as my visual guides – the mountain range in the back and the tree on the right side of the frame:
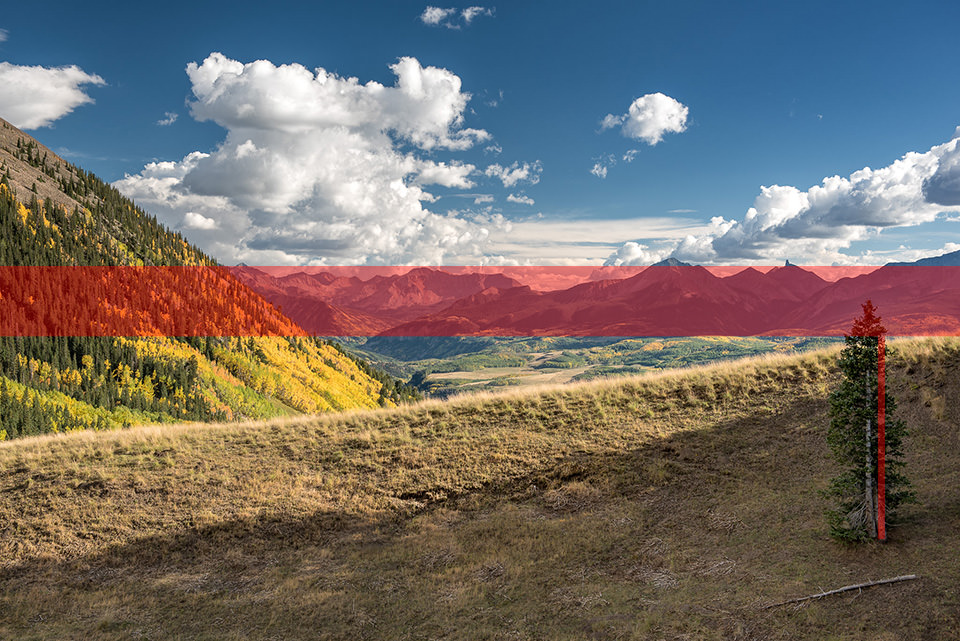
NIKON D750 + 24-70mm f/2.8 @ ISO 100, 1/80, f/5.6
2.4) Landscape Example #3
This is another tough one, because there are no clear lines in the frame. I have seen many photographers struggle with scenes like this and they have to lose portions of the frame when they align it properly later in the post. Which visual guides do we use here to properly align the scene in the viewfinder?

NIKON D750 + 24-70mm f/2.8 @ ISO 100, 6/10, f/8.0
I used the tree in the center of the frame, the peak of the mountain and the two hills on the sides of the frame as my visual guides. The heavy one here is obviously the hill line – if that appears too crooked, the whole scene will be thrown out of balance:
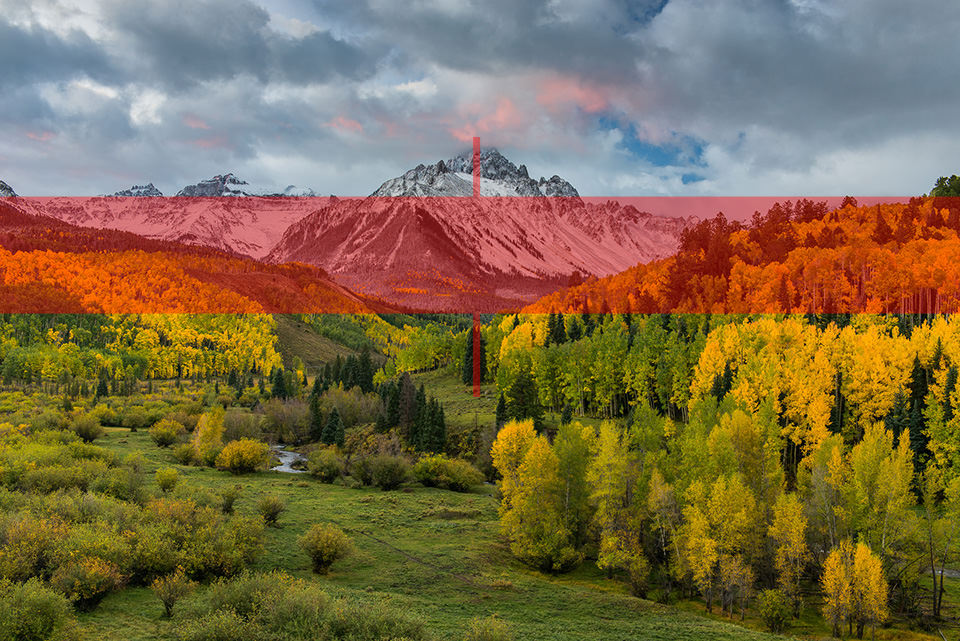
NIKON D750 + 24-70mm f/2.8 @ ISO 100, 6/10, f/8.0
2.5) Bridge Example
In the below example of a bridge, do we align the scene using the bridge or the horizon?
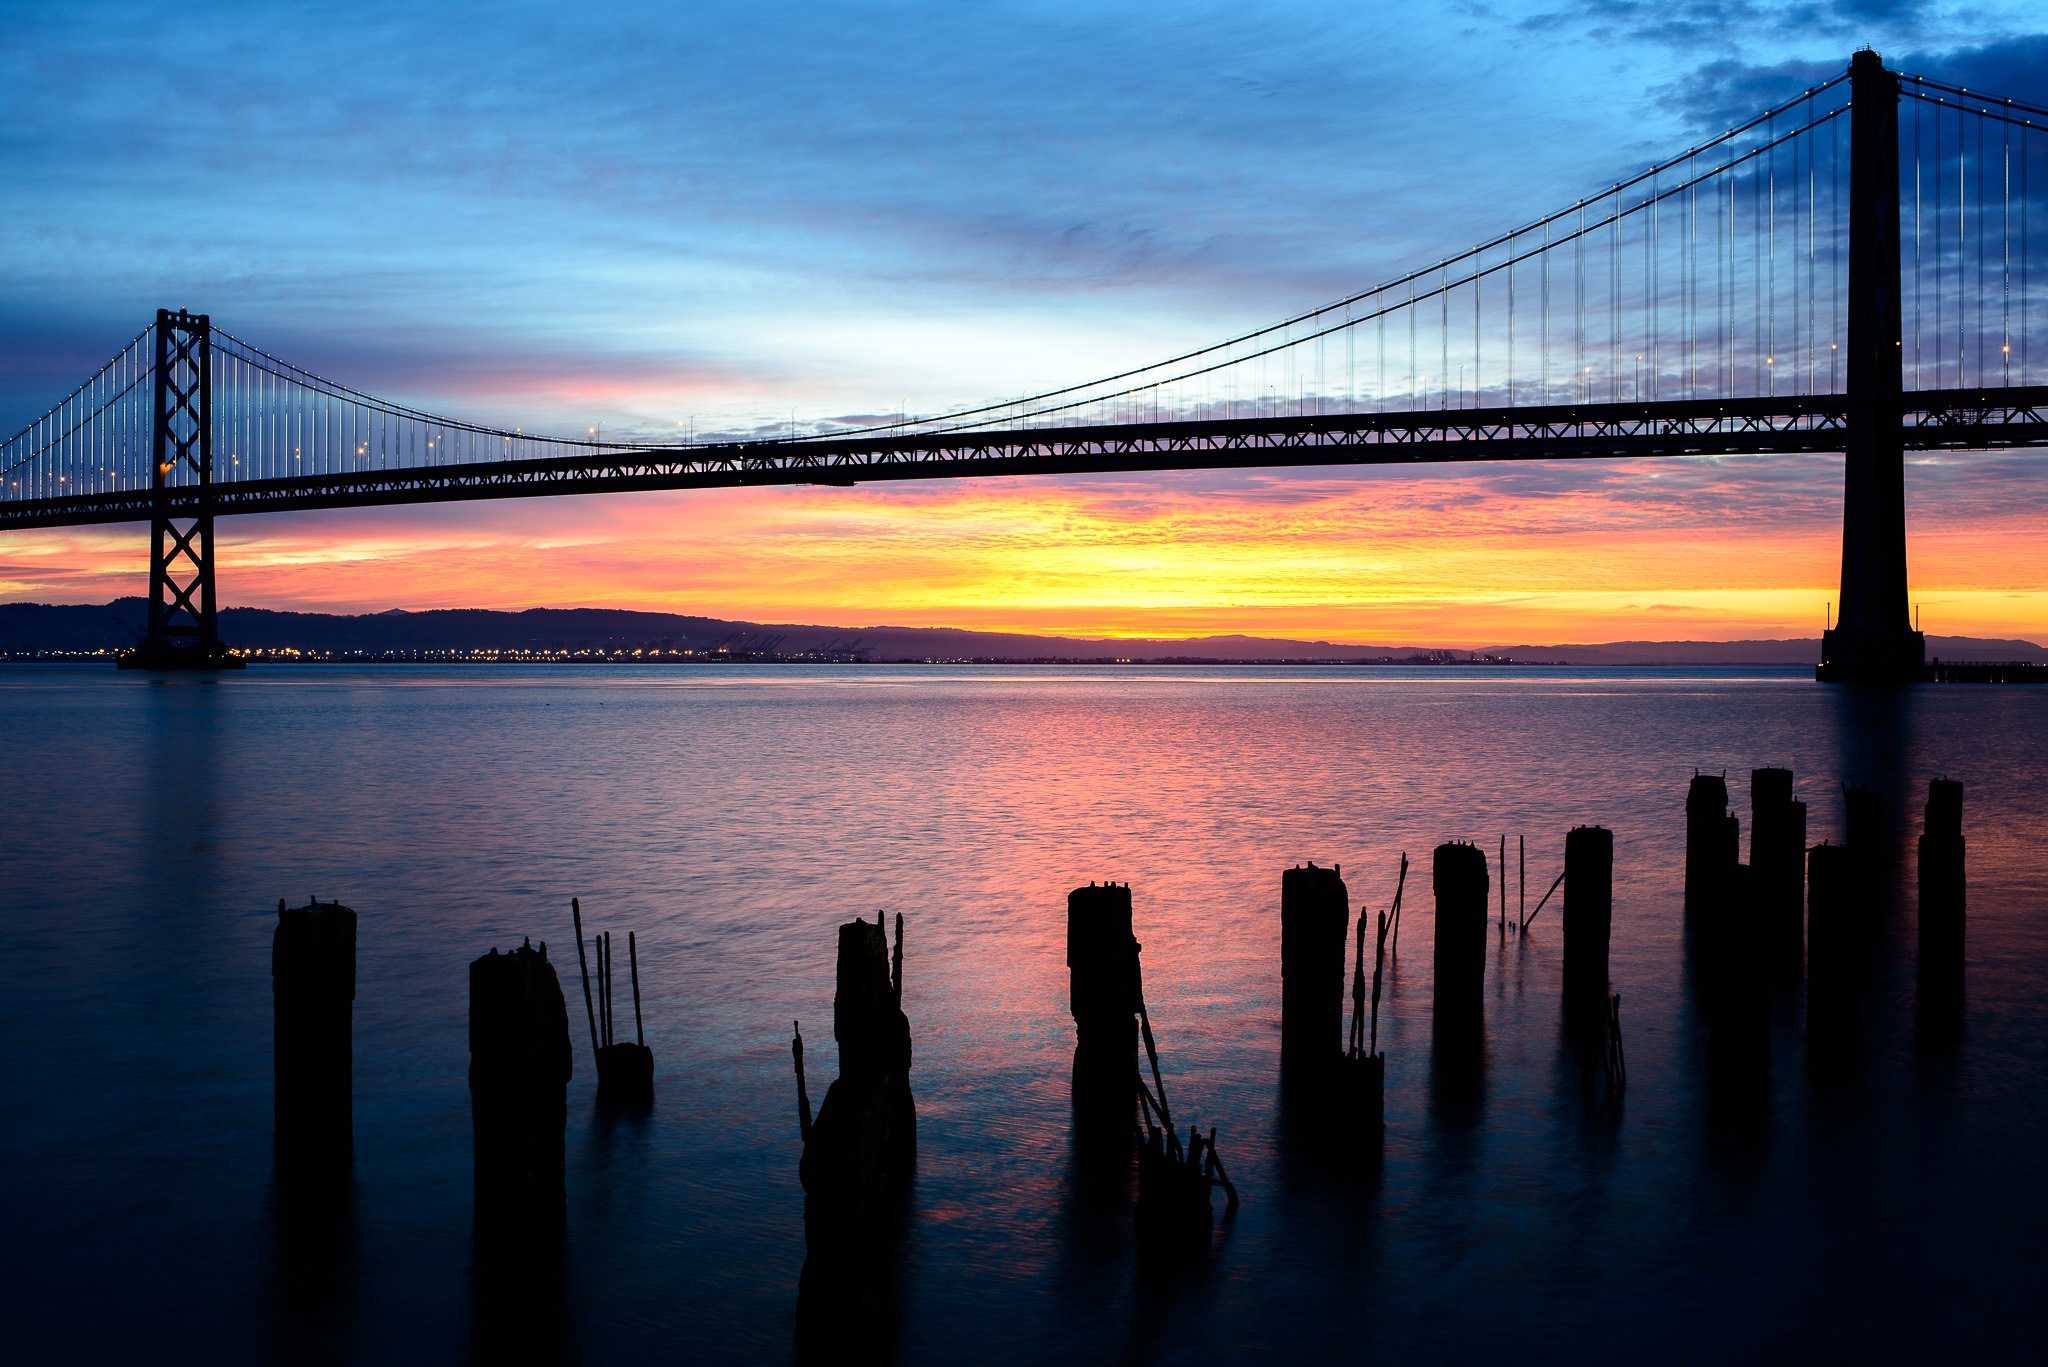
NIKON D800E + Zeiss Distagon T* 1.4/35 ZF.2 @ ISO 100, 13/10, f/16.0
The horizon, of course. Remember, always keep the horizon of your landscape as your main guide – everything else is part of the landscape, including the bridge. When composing this shot, I used several visual guides – the horizon and the wood sticking out of the water.
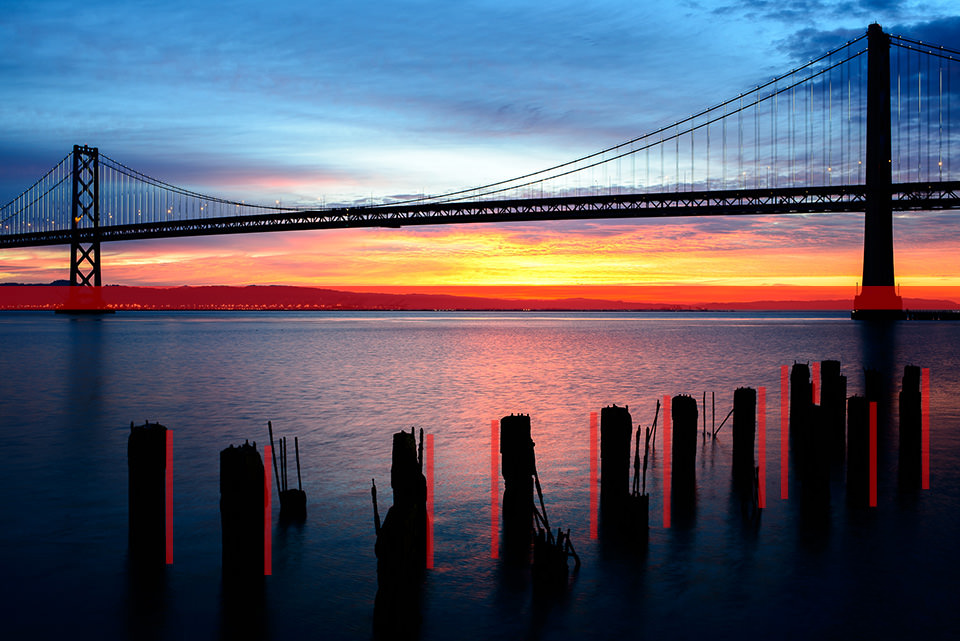
NIKON D800E + Zeiss Distagon T* 1.4/35 ZF.2 @ ISO 100, 13/10, f/16.0
Hope you enjoyed this article. If you have any questions or feedback, please post them below in the comments section.


0 comments: